
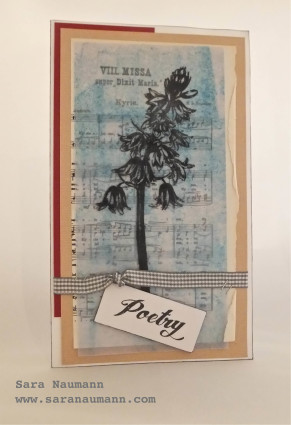
Wondering how to use ICE Resin® for cardmaking? Coating a piece of paper with ICE Resin creates a gorgeous, transluscent sheet that’s perfect for handmade cards. You can stamp and color inexpensive white computer printer paper, then layer it on top of sheet music, book paper or patterned paper to turn it into a lovely card focal!
What is ICE Resin?
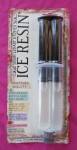
ICE Resin is a two-part resin epoxy. It’s super-easy to use: Just measure, mix and apply to your paper with a bit of kitchen sponge. You can get the two parts together in a one-ounce syringe that mixes a precise amount for you, like this one…
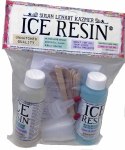
…or get an 8 oz kit that comes with the resin and hardener, plus stir sticks and cups.
What type of paper to use with ICE Resin?
You want paper that’s lightweight and porous. Paper that’s coated (think glossy or magazine pages) will not absorb the resin. Plain white computer paper is fabulous—it’s inexpensive and you probably have some around the house. You can spray it first with Dylusions or other color sprays, or brayer it with ink or do direct-to-paper inking techniques, then stamp it before adding the resin.
What you’ll need:
Paper Artsy stamps: HP1010EZ
ICE Resin® measuring cup, stir stick
Latex gloves
Small piece of kitchen sponge (about 2” or 5cm)
Ranger Distress ink: Peacock Feathers
Ranger Archival ink: Jet Black
Sheet music
Brayer
White computer printer paper
Red, white, tan cardstock
Gingham ribbon
Foam mounting tape
Craft sheet or plastic garbage bag
Clear tape
Here’s how to do it:
1) Brayer a piece of white computer paper with Peacock Feathers ink, then stamp the flower with black.
Ice Resin Tip: You’ll be able to coat several sheets of paper with one ounce of resin. I usually have a stash of 10 or so sheets of paper on hand, so no resin goes to waste!
2) Mix 1 ounce of the resin: Fill the measuring cup halfway with Part A resin. Be sure to measure precisely. Full the rest of the cup with Part B hardener. Use the stir stick to mix the resin. Mix well for two minutes, blending completely.
Ice Resin Tip: You have about 45 minutes of working time before the resin starts to set, so you’ll want to work fairly quickly.
3) Place the paper on your craft sheet or garbage bag, then dip the sponge into the resin and coat the front side. Flip the paper over and coat the other side. Let the resin dry—this can take 6-10 hours, depending on the humidity and the thickness of the resin. Peel off the craft sheet and it’s ready to use!
4) Cut the paper to 3 1/2″ x 7″ and mat on sheet music. (You can easily cut the resin paper with a paper trimmer or scissors.)
5) Mat again on tan and red cardstock, then wrap with ribbon. You can staple the resin paper; here I’ve used a mini stapler to secure the ribbon.
6) To stamp the word “poetry”: Put clear tape all over the rest of the quote on the stamp, ink it and remove the tape, then stamp the single word on white cardstock. ink the edges and glue as shown with foam tape.
7) Make a 7 1/2″ x 4 3/4″ card blank and glue the matted focal to the center. Ink the edges.
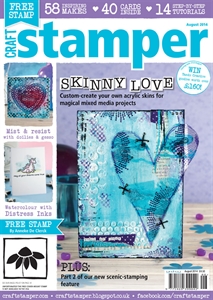
That’s it—easy, isn’t it? For more projects, you can check out the August 2014 issue of Craft Stamper magazine. (If you’ve never read Craft Stamper before, you’re in for a real treat!)
And if you’d like to see videos on using ICE Resin, come on by Studio SN on You Tube and check out these cardmaking videos:
Using ICE Resin with Map Paper
How to Make a Paper Journal with ICE Resin
Cardmaking with ICE Resin and 3-D Embellishments…or
ICE Resin and Ink Spray for Cardmaking
One word of warning? ICE Resin is totally addicting—don’t say I didn’t warn you! 🙂 Enjoy!


