This week on Studio SN: Dylusions and heat-embossing!
I love love love resist techniques (as you can see in my mini e-book on Irresistible Resists) and this is one of my favorites: Heat-embossing with clear powder, then spritzing with Dylusions ink.
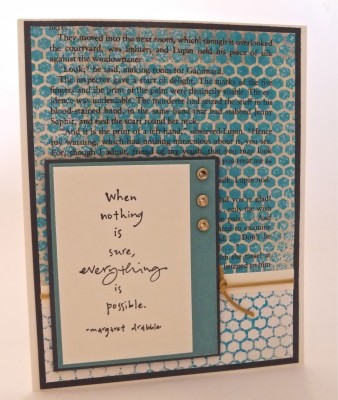
This particular card project has a twist, though. After spritzing the embossed paper, I blotted it with a piece of cardstock to get another pattern…this one, a reverse image of the stamped design. Two backgrounds in one go!
Here’s what you’ll need:
– Calypso Teal Dylusions from Ranger
– Cover a Card Honeycomb stamp and Mega Mount from Impression Obsession
– Clear detail embossing powder
– Watermark Resist inkpad from Ranger (or other embossing ink)
– Archival Black ink from Ranger
– Heat tool
– “When Nothing is Sure, Everything is Possible” stamp from Penny Black
– Page torn from a book
– Cardstock: White, teal, navy
– Gold cord, gold brads
– Cardboard box or other for protecting work surface
– Foam tape
– Blank white card (mine is 5″ x 6 1/4″)
Here’s how to make the card:
1) Emboss the book paper with the Honeycomb stamp and clear embossing powder.
2) Spritz with Dylusions, then immediately blot with a piece of white cardstock.
3) When dry, glue a 2″-wide piece of the reverse-pattern cardstock overlapping the bottom of the heat-embossed piece. Cover the seam between the two papers with a narrow strip of white cardstock.
4) Trim the piece to size, then wrap with gold cord and mat on navy cardstock. Glue to the card front.
5) Stamp the quote on white cardstock, then mat on teal and navy. Add three brads and adhere to the card with foam tape.
Want to see the video demonstration? Then stop on by Studio SN on You Tube! Hope to see you there!