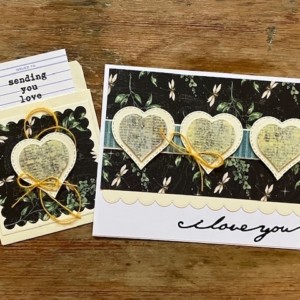
Today on Studio SN on You Tube: Faux-saics! (Or, faux-mosaics.)

This technique is a lot of fun—it’s little different and I found it’s a great way to put your templates and paper scraps to use. The result is a card focal that’s tactile and combines a variety of colors and patterns.
And it’s easy!
Here’s what I used:
– Just a Little Greeting stamp set
– Brayer or bone folder
– Black embossing powder and heat tool
– Carpet tape or other double-sided tape
– Circle punches: 7/8″ and 1″
– White cardstock, black cardstock
– Gold brad, red ribbon
– Black inkpad
– Foam tape
Template, paper, stickers and stamps from Paper Wishes.
Here’s how to make it:
1. Trace the heart shape on white cardstock and cut out. Cover with strips of tape. Remove the liner and adhere triangular pieces of patterned papers, leaving space between each piece. Turn over and trim the excess.
2. Place the heart right-side up and sprinkle with embossing powder. Press a scrap piece of paper on top and burnish well to set the powder. Tap off excess (use a small dry paintbrush to brush off excess if necessary) and heat-set.
3. Make a 5″ square card and cover with brown patterned paper. Mat 1/2″-wide strips of green patterned paper on white, then glue to the top and bottom as shown. Add gold sticker borders.
4. Mat a 1″-wide strip of red patterned paper on white and glue across the card front. Add a gold sticker across the strip.
5. Use foam tape to glue the heart to the card front. Tie a knot in a piece of sheer red ribbon and glue to the heart as shown. Stamp “with love” on white cardstock, then punch into a 7/8″ circle. Mat on a 1″ black circle and glue with foam tape.
Want to see the video demonstration? Then come on over to Studio SN on You Tube!
Happy Wednesday!