
Today on Studio SN on You Tube: Painting with Perfect Pearls!
(It’s a super-huge photo this week—as I mentioned in the video, the spattering was hard to see in the tutorial, so I wanted to make sure you could see it here!)
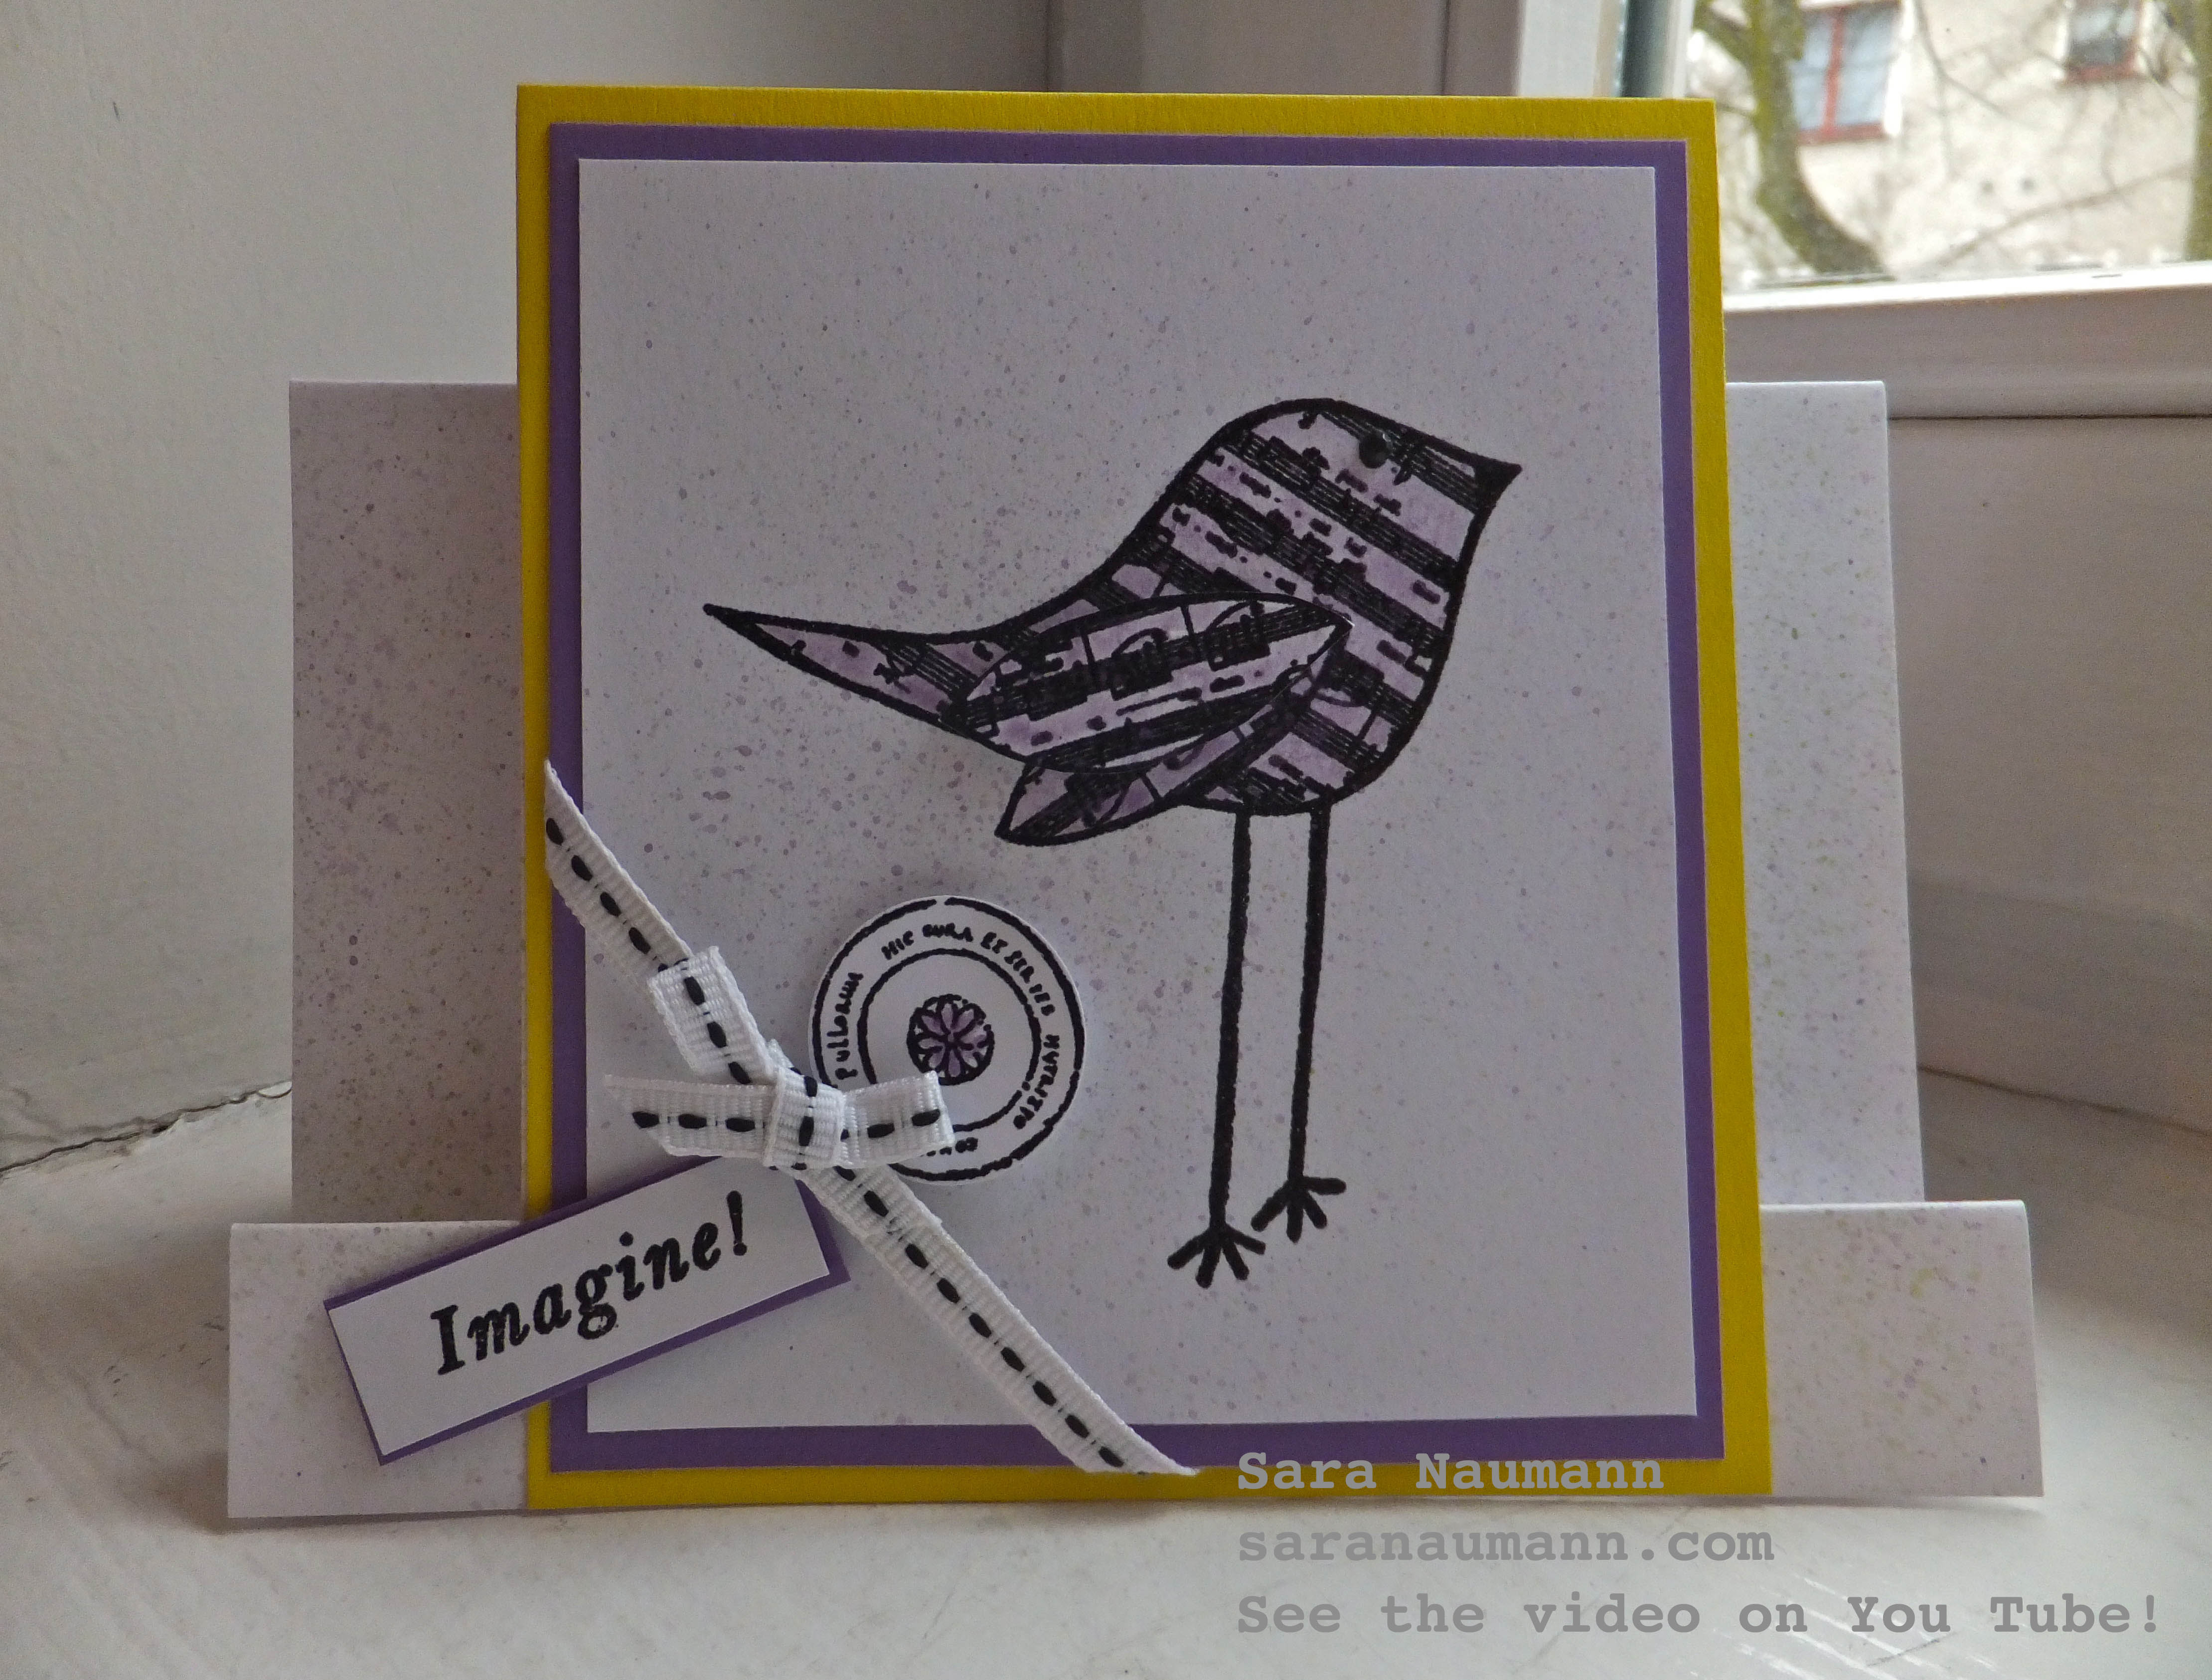
Perfect Pearls are a lot of fun and a great way to add a bit of shimmery color to your cards. Here I’ve used it to color in a stamped, embossed image. The raised edges of the embossed lines help hold in the watery Perfect Pearls, and act as a resist so you don’t dull down your stamped image. Plus it’s fast and easy to do!
Painting with Perfect Pearls, what you need—
– Grape Fizz Perfect Pearls: Confections Perfect Pearls (Ranger)
– Stamps: Eclectica ESN15 (PaperArtsy)
– Ebony Super Fine Embossing Powder (WOW Embossing)
– Center Step Card (Hot Off The Press/Paper Wishes)
– Embossing ink—if you get your Perfect Pearls in a set with Perfect Medium, this can be your embossing ink
– White and black ribbon
– White, green, yellow cardstock
– Stipple brush (Faber-Castell)
– 1″ circle punch
– Water mister
– Foam tape
– Clear tape
Painting with Perfect Pearls, how to make it—
1. Stamp and emboss the bird on white cardstock. Stamp and emboss a second image on white—you’ll only need the wing.
2. Tap a bit of Grape Fizz Perfect Pearls onto a craft sheet. Spritz water next to the Perfect Pearls, then mix together. The more water you use, the lighter your color will be. Use the Perfect Pearls brush to paint the bird’s body and wing.
3. Use the stipple brush to spatter the rest of the Perfect Pearls onto the white cardstock and on the card blank.
4. Cut out the wing and use foam tape to attach it to the bird body, slightly offset.
5. Mat on purple and wrap with ribbon. Glue yellow card to the center of the card blank, then add the stamped focal on top.
6. Stamp and emboss the circle image and paint the flower with Perfect Pearls. Add to the card front with foam tape.
7. Stamp and emboss only the word “imagine” from the quote: Use clear tape to mask off the second line of the quote to isolate the word “imagine”. Ink the stamp, then remove the tape. Stamp and emboss on white cardstock, then trim and mat on purple. Add to the card front with foam tape.
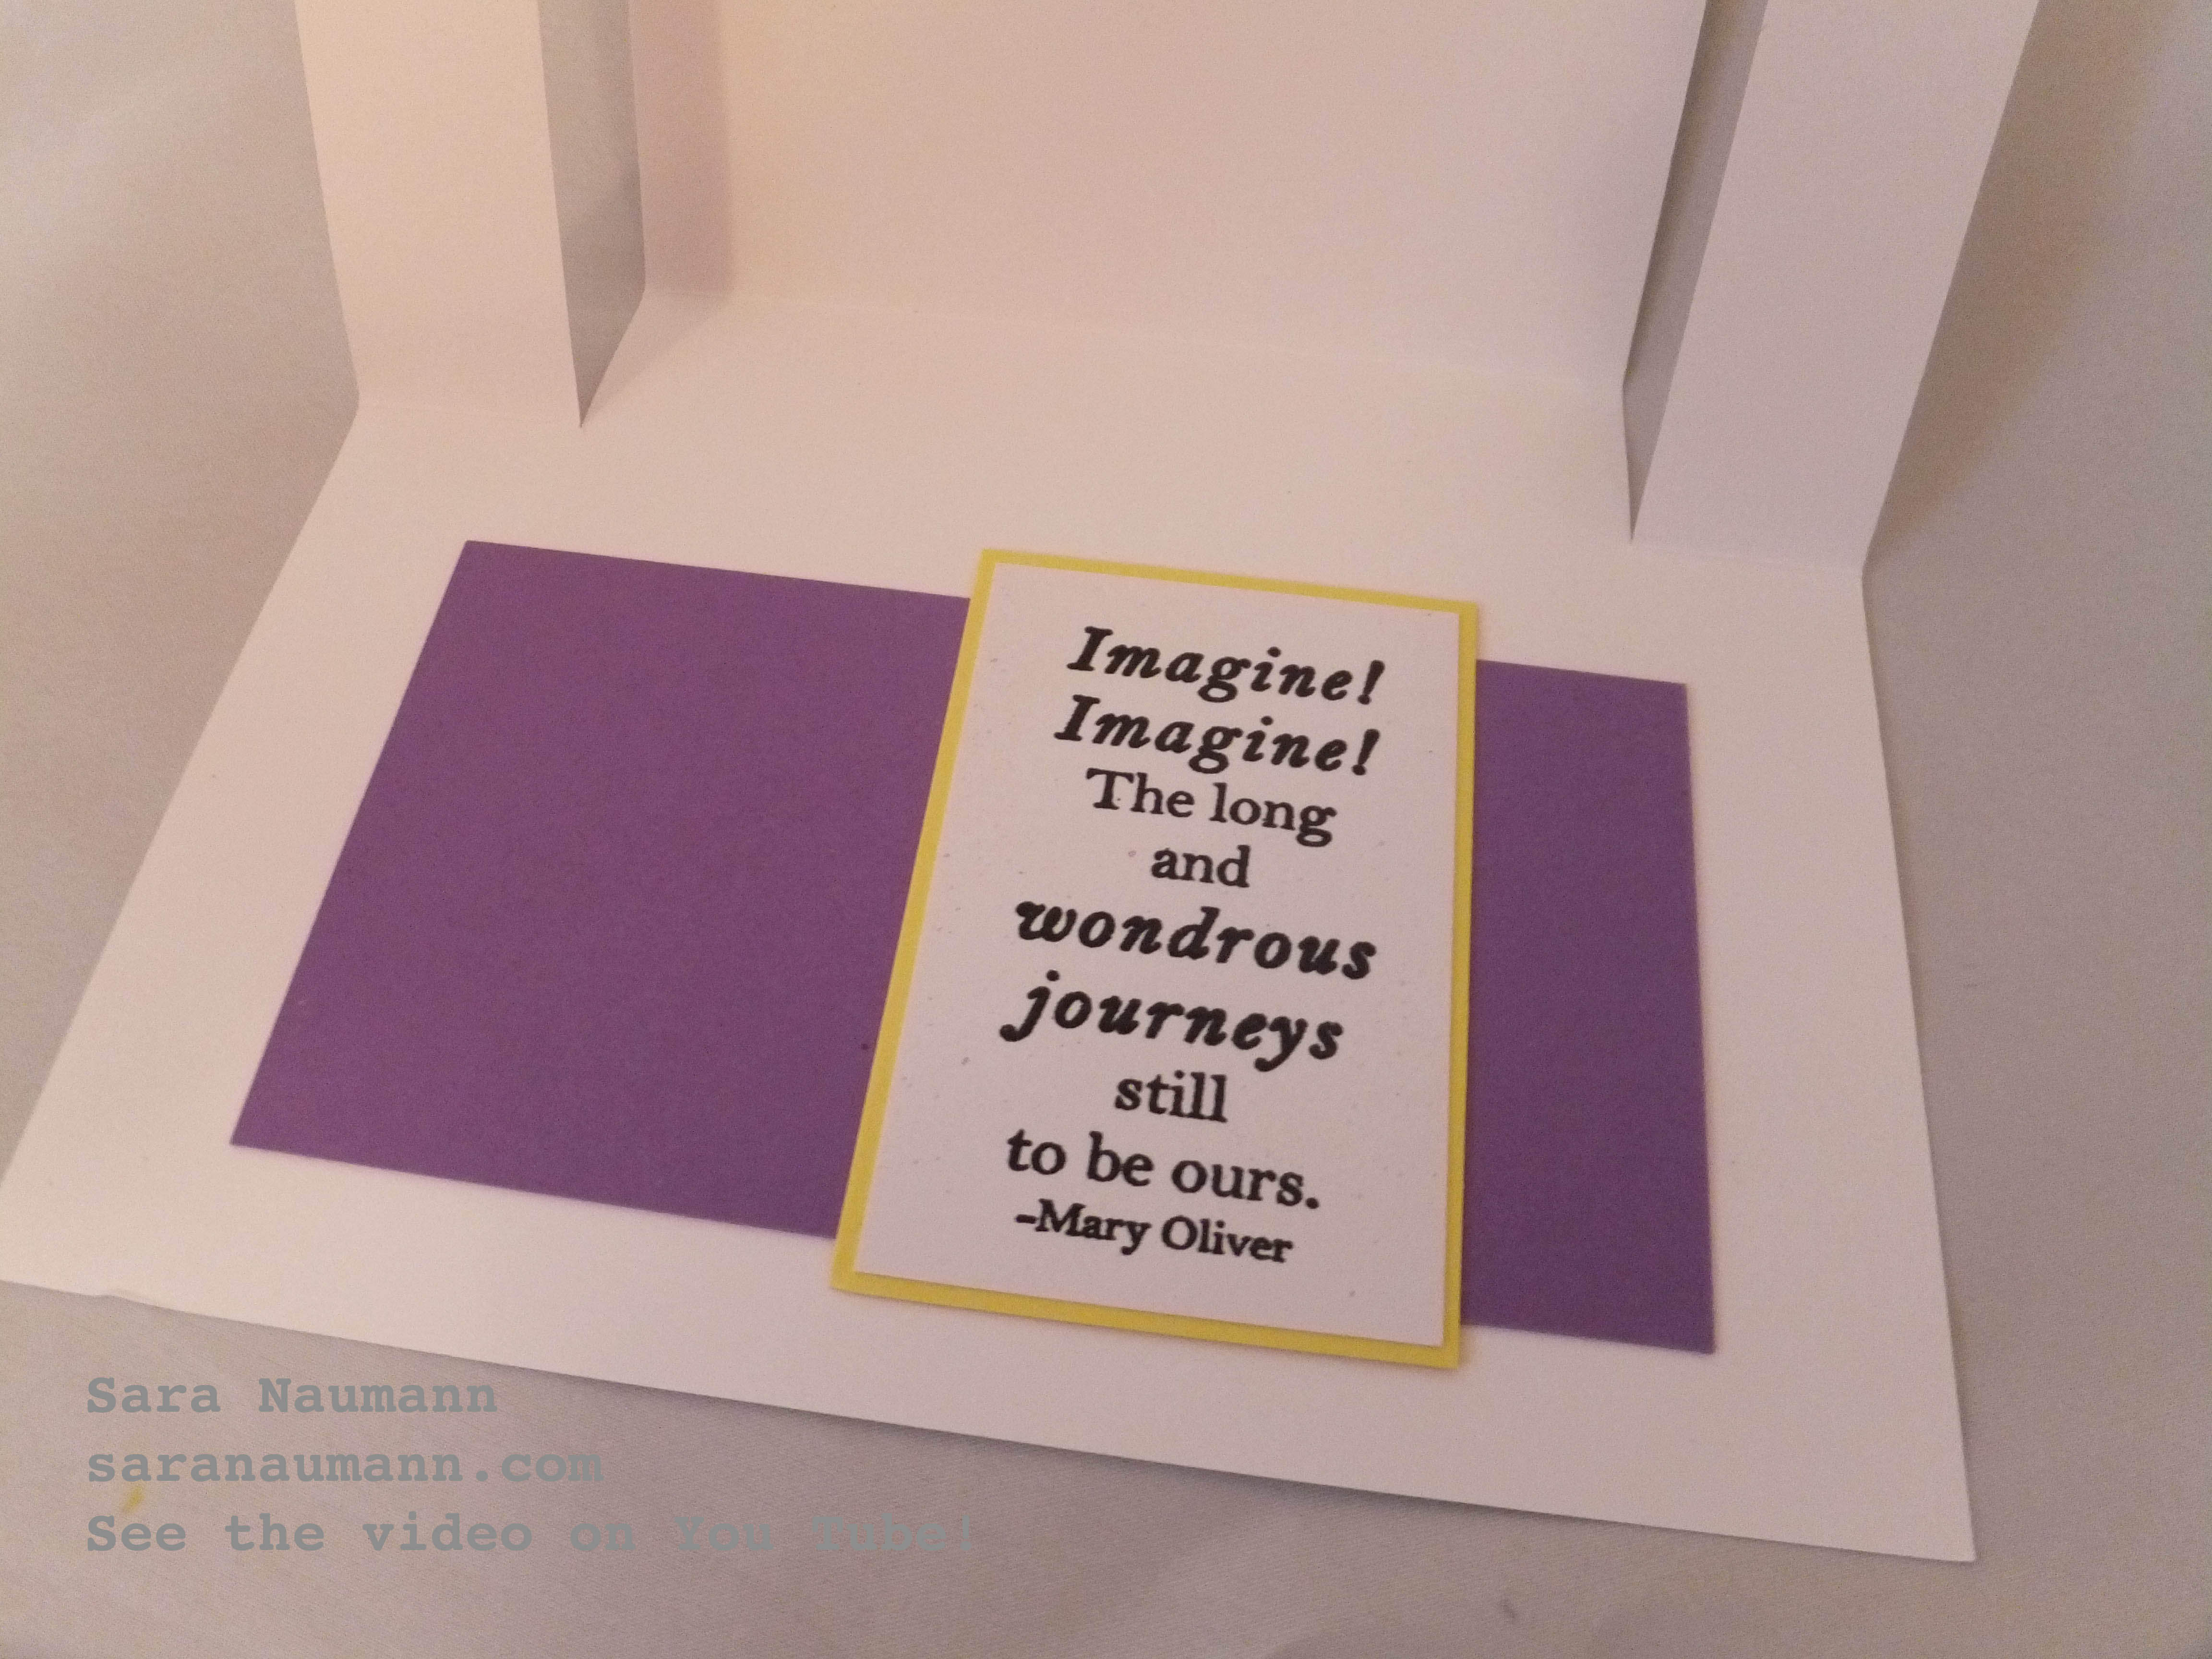
8. For the card inside: Stamp and emboss the sentiment on white card, mat on yellow and purple and add to the inside of the card. Here’s a look at the inside:
Want to watch the video tutorial? Then pop by Studio SN on You Tube to watch Painting with Perfect Pearls!


Such a lovely card, and great idea to use my perfect pearls! Your new stamp sets are divine!