Happy Wednesday!
Recently, I got my crafty mitts on the Screen Sensation Starter Kit. This is a screen printing tool that allows you to create beautiful, surprisingly intricate images using mesh screens and specialty inks. In many ways, it’s like stamping in that you can easily duplicate an image, but it’s a different process and therefore gives a very different look. To me, it has that same lovely handcrafted look but the difference is that it’s easier to use on multiple surfaces such as clothing.
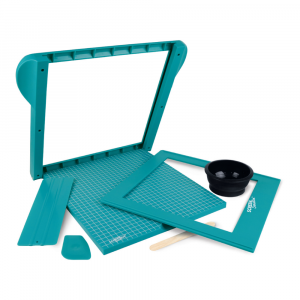
I first saw the Screen Sensation on a little You Tube video back in January. I immediately got super-excited…I’ve been interested in screen printing for a long time, but the traditional set up involves a lot more than my tiny craft area can handle, space-wise. This tabletop tool means I can screen print in a small space, and the mess is really minimal.
Then I saw the Screen Sensation in action at a craft industry trade show and I basically went bananas. It was so easy to use, and the designs available on the screens were gorgeous. It was the first time in a long time that I got so excited about a craft product, and so of course I had to have a go myself.
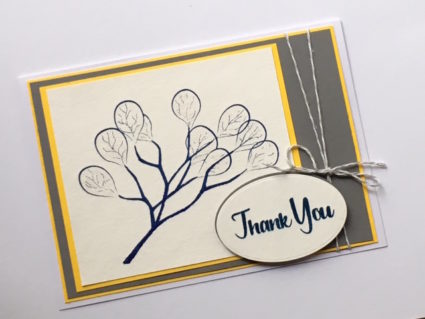
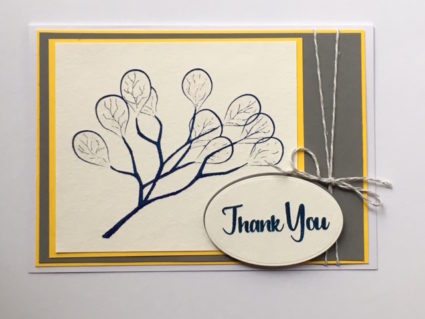
The main image is the screen printed part. The “thank you” sentiment has been stamped.
Screen Sensations Thank You Card, what you need—
- Screen Sensation Starter Set
- Screen Sensation Fixing Tape
- Screen Sensation Blue Screen Printing Ink
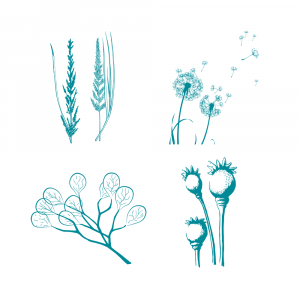
- Screen Sensation Seed Pods Screen
- Altenew Adore You Stamp Set
- Altenew Desert Night ink
- Tattered Lace Essentials Ovals die
- Wink of Stella in Clear
- Watercolor cardstock
- Gray, yellow card
- Gray baker’s twine
- Foam tape
Screen Sensations Thank You Card, how to make it—
1. Tape the mesh design in the center of the screen, securing all four sides with tape. Slide your screen into the Screen Sensation.
2. Place your paper on the Screen Sensation, using the grid to align it. Tape it securely.
3. Apply ink to the top of the mesh design. Use the squeegee to pull the ink to the bottom. Note: The Seed Pods screen has four designs. You can either print all four designs, just the top two, or only the one you want. I just go ahead and do more than one since I can save them for other cards.
4. Lift the Screen Sensation to reveal your print. Remove the print and set aside to dry; you can immediately replace the cardstock and make another print.
5. Trim the seed pod image and mat on yellow card. Mat again on gray card, leaving a wide border on the right side. Mat on yellow and wrap the right side twice with gray twine. Glue to the front of the card.
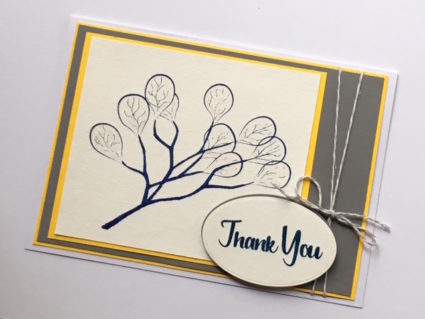
6. Use blue stamping ink to stamp “thank you” on watercolor cardstock. Die cut into an oval. Die cut a gray oval, the same size, and use foam tape to attach the two, placing the gray oval slightly behind the stamped oval to create a shadow. Glue to the card front. Tie a bow around the two pieces of twine, resting just at the top of the oval.
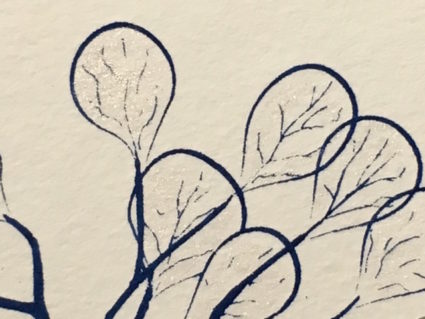
7. Use the Clear Wink of Stella to color in some of the leaves to create a shimmery effect.
That’s it…easy! And best of all, clean up is quick and simple since the screen fits into a standard kitchen sink and can just be rinsed off and laid flat to dry.
Look for a complete article on screen printing with the Screen Sensation (see how I used the other designs on the Seed Pod screen) in the August issue of Crafts Beautiful magazine.
For more details on the Screen Sensation, you can visit their website. They have videos to step you through the process and yes, I’ll be filming one shortly as well!
Happy Wednesday!