This week I’m super excited to be a guest blogger at PaperArtsy! You can see step-by-step photos of today’s blog post below. The video is on my Studio SN You Tube channel—you can also pop by the PaperArtsy blog and the PaperArtsy You Tube channel to see this video and lots of others—they are a fabulous source of written and video tutorials on all kinds of stamping techniques. Enjoy!
All Life is an Experiment: Tinting Grunge Paste for Eclectica Stamping
By now you know I’m a bit of a Grunge Paste addict. Well, this week I’ve been playing with different methods of coloring Grunge Paste. It’s gone a bit cold and gray here in Poland, so I wanted to create some bright, fresh color!
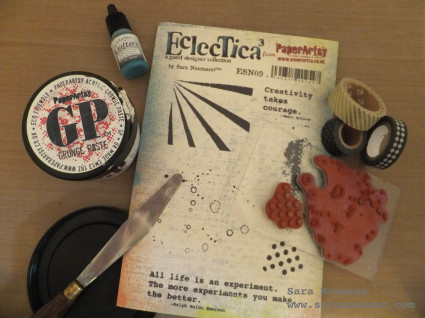
Grunge Paste has a natural putty color that’s ideal for tinting with pigment ink reinkers. The best thing is that you only need one drop to get a gorgeous color! Pigment ink is a great option for this and a super way to put those reinkers to use.
And adding pigment ink to Grunge Paste means you get the texture and dimension of Grunge Paste, too—just with fabulous custom color. Pair it with texture stamps like these from the Eclectica ESN09 set, and you’ve got a colorful background.
Want to see a video demo of the project? You can find it on the PaperArtsy You Tube channel!
Okay, let’s get to the step-by-steps—
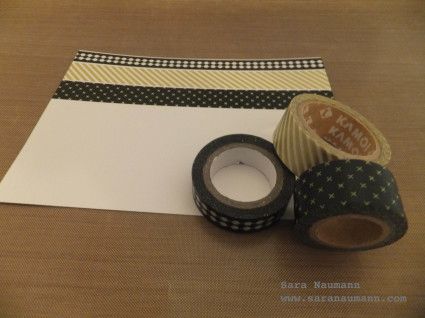
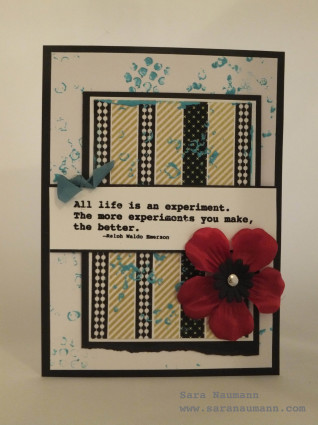
- Place strips of washi tape onto white card. I chose three in a color scheme of black, white and gold metallic. They coordinate nicely with each other and will provide a distinct contrast to the teal Grunge Paste. Trim the piece and mat it on white card, then black. Tear the bottom of the black card.

- Place some Grunge Paste on a craft sheet or palette and squeeze in a drop of ink. I’m using Clearsnap’s Crafter’s Aruba refill. One drop will do it. Mix with your palette knife.
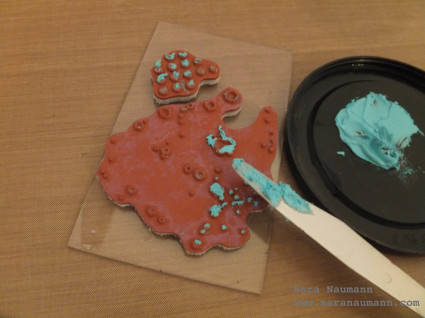
- Place the polka dot and open-dot spatter stamps from the Eclectica ESN09 set onto a Flexi Block. Use the palette knife to apply the tinted Grunge Paste to the stamps and stamp on the washi tape piece.

- Use the palette knife to edge the washi tape piece with tinted Grunge Paste. Let dry—I pop the piece on the Grunge Paste jar so the edges can dry without touching anything.
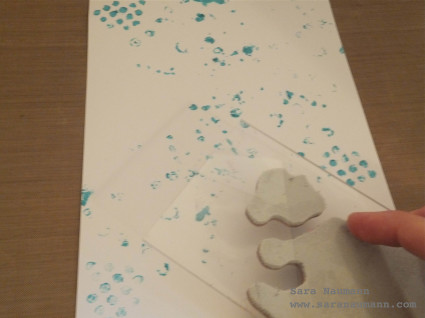
- Stamp the dot and spatter with tinted Grunge Paste as before on a piece of white cardstock. Let dry, then glue the washi tape layer on top.

- Stamp and heat-emboss “all life is an experiment” with black embossing powder. Mat the long edges on black cardstock and glue to the washi tape layer, trimming the edges even with the sides of the white card. Glue to a black card blank.
- Add a layered silk flower as shown, and a knotted piece of teal ribbon.
I hope you enjoyed the project as much as I did! Remember, you can see a video tutorial for this project on the PaperArtsy You Tube channel.
Thank you also to the lovely Leandra and the lovely folks at PaperArtsy for inviting me to be a part of the PaperArtsy blog!