
Welcome to Washi Tape Tuesday! Love washi tape? (Or maybe you have a stash that you want to put to use?) Then join me for tips, techniques and ideas for adding washi tape to your handmade cards!
Washi tape can be a great background for a stamped design!
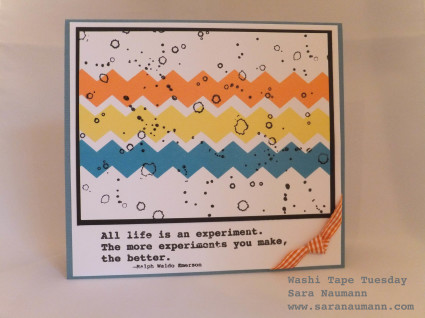
For this card, I placed the chevron-shaped washi tape strips horizontally across the card, then stamped on top with a random spatter pattern. This creates a nice balance between the strict and straight lines of the tape and more organic pattern of the stamp. The combination suits the sentiment of the stamp, too, don’t you think?
A couple of things when stamping on washi tape—
First, choose an ink that will dry. You can go with a fast-drying solvent ink like Surfacez or StazOn. Ranger’s Archival works as well. For this card, I wanted to experiment so I used my Versafine, which is an “instant dry pigment ink”. It doesn’t dry as quickly as the others, so you’ll want to let the stamped piece set aside for awhile to dry or give it a quick zap with a heat gun, taking care that you don’t overheat and warp the washi tape. Regular pigment inks are definitely not your best choice, but you have plenty of others to choose from—depending on what you have in your stash. Note: My stamped design has quite fine lines, so there’s not much ink to dry. Your results will be different if you’re stamping with a bolder or silhouette stamp.
Second, note the “seam”. You can see that I’ve left space between each strip of tape. This creates an illusion of depth that I really like, but of course you could also place the tape strips aligned with each other. In either case, you’ll want to be aware of the very slight “seam” between the tape and the paper—or the tape and the other strip of tape. Washi tape is not thick, but that little seam can make a difference with finely detailed stamps. This is why I love random or overall stamp designs.
Third, when you stamp, be sure to stamp straight up and down—the tape can be a bit slippery, so be sure you don’t press too hard or at an angle.
Of course, the more you do, the faster and easier it is to get a perfect impression!
Washi Tape Tuesday: All Life is an Experiment
What you’ll need:
– Stamps: Eclectica ESN09 (PaperArtsy)
– Chevron Washi Tape: Apricot, Marigold, Nautical (We R Memory Keepers)
– Cardstock: Black, white, blue
– Orange gingham ribbon
– Clear tape
How to make it:
1. Place three strips of chevron washi tape horizontally across a piece of white cardstock. Trim edges or fold them under the cardstock.
2. Stamp the open circles design with black randomly across the cardstock piece.
3. Let dry, then mat on black cardstock.
4. Mat onto white cardstock, leaving a border at the bottom. Stamp the quote below. Tie a knot in gingham ribbon and wrap around the bottom corner as shown.
5. Make a folded card from blue cardstock and glue the piece on top.
That’s it—easy!
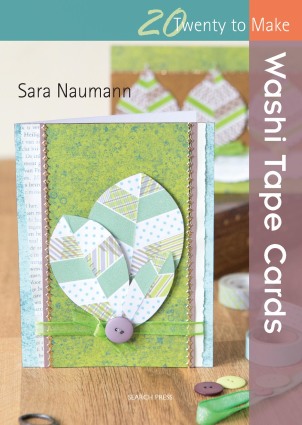
Love washi tape? Want tons of ideas, techniques and card projects? Twenty to Make Washi Tape Cards is packed with 20 washi tape projects, each with complete step-by-step instructions—PLUS 20 alternate card ideas…you get 40 creative washi tape card project ideas in all. Available from Search Press, this instruction book is the perfect thing for cardmakers who love washi tape!


I love this card you made! I’m gonna check for that book next time I’m at my local craft store. If I can’t find it there, I’m gonna order it online. Thanks so much for sharing your creativity with me! (and others) Hugs!!