
Today on You Tube: Cardmaking with ICE Resin and 3-D Embellishments!
I’m super-excited to show you this technique.
I’m sure you’ve seen jewelry with 3-D items embedded in a bezel or pendant filled with resin, but you might not have thought about using resin to embed 3-D items on a flat surface like paper.
I have to admit, when I first realized this I felt like I’d discovered a new planet. (But then, I don’t get out much.) Now I want to do this technique with all my resin papers!
Okay, here we go—here’s what you’ll need:
– ICE Resin® two-part epoxy, plus stir stick and measuring cups—all available from ICE Resin
Note: You can buy ICE Resin® in 8oz or 1oz sizes. If you’re new to it, you might start with the 1oz kit, which also measures out the proper mixture for you.
– Color spray: Tangerine (Stephanie Barnard for Clearsnap)
– Kitchen sponge
– Plastic/latex gloves
– Craft sheet (Ranger)
– Book paper
– Stamp: Birthday Greetings (Hot Off The Press)
– Off-white, black cardstock
– Black ribbon
– Black inkpad
– Buttons
– Pen: PITT Sky Blue (Faber-Castell)
– Off-white blank card (mine is 4 1/2″ x 6 1/4″)
My constant note about your work surface: I use Ranger’s craft sheet to protect my table because I can re-use it again and again—wet resin can be cleaned off with a baby wipe, and any dried resin drips can be scraped off with an old hotel key card. If you don’t have a craft sheet, you can also cut apart a plastic garbage bag. One side of your paper will have a slight texture from the plastic bag (which may or may not concern you) and you will need to toss it when you’re done.
Here’s how to make the card:
1. Spray a sheet of book paper with Tangerine. Let dry, or heat-set.
2. Mix one ounce of resin epoxy according to the manufacturer instructions. Place the sprayed book paper on your craft sheet and dip the sponge into the resin. Work from the center of the paper to the outer edges, spreading the resin with the sponge. When you’ve coated the front of the paper, flip it over and coat the back.
Note: A one-ounce mixture of resin allows you to coat several pieces of paper—I keep a small pile on hand (and an extra craft sheet) so I can use up all of the resin I’ve made.
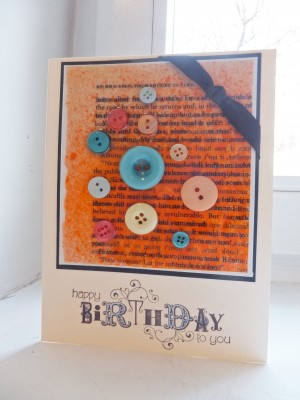
3. Place buttons on the book paper while the resin is still wet. Let dry.
4. Cut the resin paper to 4 1/4″ x 3 3/4″ and mat on off-white cardstock, then on black. Tie a knot in a piece of black ribbon and wrap around the top right corner.
5. Stamp the sentiment at the bottom of the card front and color in some of the letters with blue pen. Glue the resin piece to the card front.
That’s it! I hope you’re as excited about this technique as I am! (And I hope you get out a little more than I do.)
Want to see the video tutorial? Then pop on by Studio SN on You Tube! See you there!


