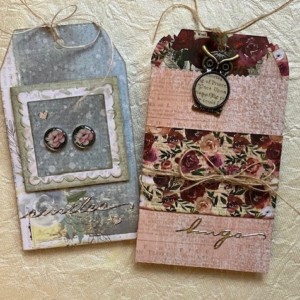
Create a simple, sparkling pendant—with a customized Tag in a Bag for gift presentation!
Today, we’re diving into the world of resin crafting to create a sparkling necklace pendant as part of a Tag in a Bag project. If you like this, then please come join me for the Resin + Paper Crafting: A Match Made in (Crafting) Heaven workshop at BellaCon 2024, where we’ll create two Tag in a Bag projects with resin embellishments.
What is a Tag in a Bag?
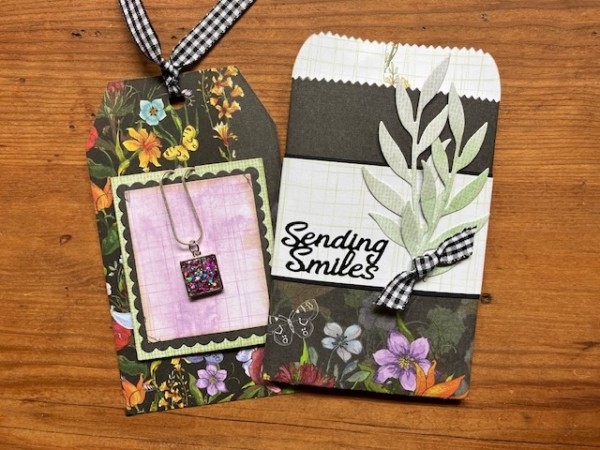
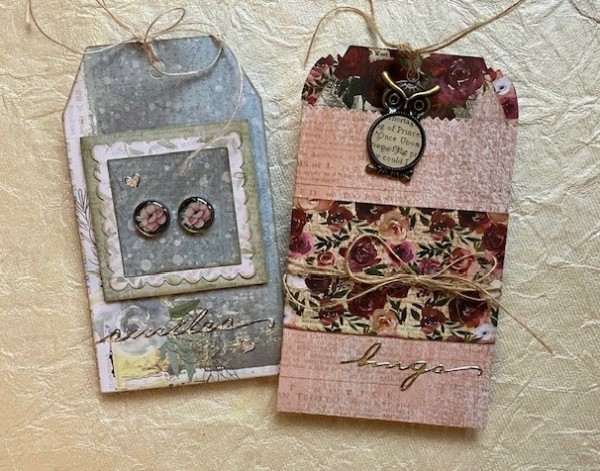
A Tag in a Bag is made with a cutting die—you’ll cut a tag shape, plus a foldable envelope bag. It’s the perfect place for presenting a pendant or earrings.
Adding Resin Magic
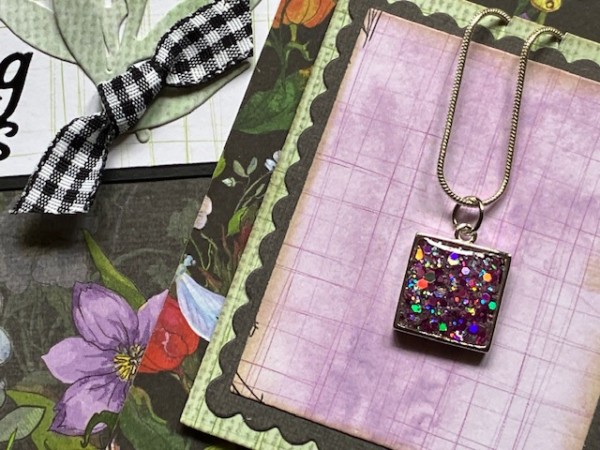
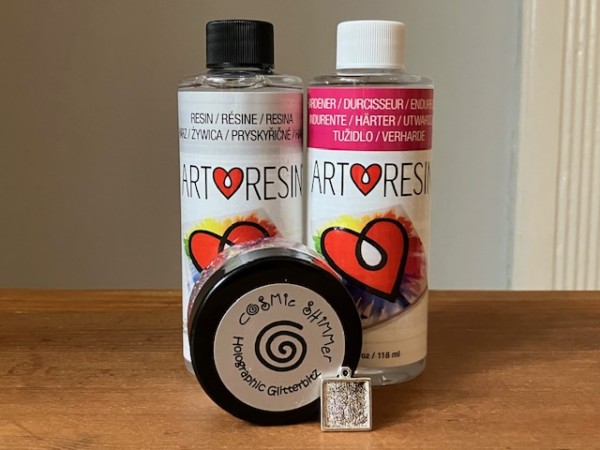
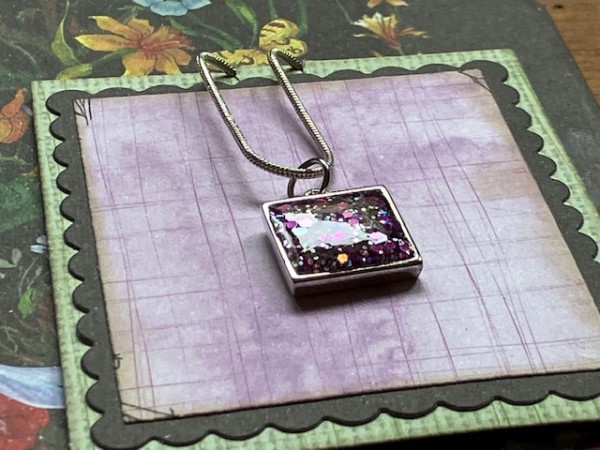
Now, let’s add a twist to our Tag in a Bag project by incorporating resin crafting. Here I’ve filled a pendant bezel with two-part resin epoxy, mixed with Creative Expressions’ Holographic Glitterbitz. These are chunky glitter pieces that work beautifully with resin.
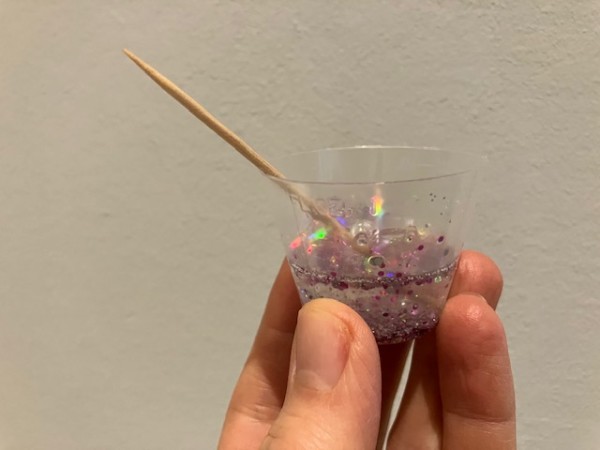
This is about 1 tbs of mixed resin, with glitter. You don’t need much to fill the bezel, but making a very tiny amount can make it tricky to mix properly. I recommend having a couple of bezels or moulds on hand to fill so nothing goes to waste.
Materials You’ll Need:
- Two-part resin epoxy (I like ArtResin)
- Metal bezel (mine is from Nunn Design, it’s the 1/2″ square with a loop at the top)
- Necklace chain or cord and a jump ring
- Mixing cups and stir sticks
- Disposable gloves
- Craft mat to protect your table
- Colored glitter (I’m using Creative Expressions’ Lilac Shine Holographic Glitterbitz)
- Tag in a Bag cutting die and die-cutting machine
- Patterned paper (this is Flower Queen from Paper Wishes)
- Ribbon
Step-by-Step Instructions:
- Prepare Your Workspace: Set up your crafting area in a well-ventilated space and cover your work surface with the craft mat to protect it from spills.
- Mix the Resin: Follow the instructions provided with your resin kit to mix the resin and hardener in the specified ratio. Wear disposable gloves to protect your hands during the mixing process.
- Customize Your Resin: Add glitter to the resin, starting with a small amount and adding more until you have the look you want.
- Pour the Resin: Carefully pour the mixed resin into the bezel.
- Allow to Cure: Place the resin mold in a dust-free area and allow the resin to cure according to the manufacturer’s instructions. This typically takes between 24 to 48 hours.
- Attach the Necklace Chain: Once the resin has fully cured, add a jump ring to the loop and attach it to your chosen necklace chain or cord.
- Personalize Your Tag: Die-cut your tag from patterned paper, then die-cut some nested rectangles. Cut two slits ant the top for the chain or cord to slot into, then add the pendant and wrap the ends of the cord or chain to the back of the rectangle. I used a Glue Dot to temporarily secure the pendant to the front of tag, and used washi tape to tack the chain to the back. Add some ribbon to the top of your tag.
- Personalize Your Bag: Die cut your Tag in a Bag. I’ve die-cut the main bag from floral paper, then added a strip of light green paper around the center, securing the ends to the back of the bag. I added the Sending Smiles sticker, plus the leaf die-cuts and a bit of ribbon.
BellaCon 2024 Resin + Paper Crafting: A Match Made in (Crafting) Heaven—with me!
I hope you can join me for my Resin + Paper Crafting workshop at BellaCon 2024!
Whether you’re a seasoned crafter or a newcomer to the world of resin crafting and mixed media, BellaCon 2024 offers a welcoming space where you can learn, create, and connect with fellow crafters in over 24 classes. The cost for the 4-day online event is $107.00, or $147 for the event plus a swag bag full of great crafting supplies. Here’s a look at the projects from my workshop—
So don’t forget to mark your calendars for BellaCon 2024, where a host of crafting instructors—including me!— are looking forward to teaching and inspiring you! Until next time, happy crafting!