
Today on Studio SN on You Tube: ICE Resin® and Color Spray!
I love ICE Resin®. I love color spray. And I love book paper. So inevitably, the three would come together on a card.
This is a fun way to use your resin’ed papers and a neat way to get texture on a card without adding a lot of bulk—especially important if you’re mailing your cards. Another thing I love? I kept my card design really simple but you could definitely add more elements. And this technique is super-versatile, since you could use these paper strips in an art journal, collage, mixed media project…you name it. I love that!
Okay, here’s what you need:
– ICE Resin® two-part epoxy, plus stir stick and measuring cups—all available from ICE Resin
Note: You can buy ICE Resin® in 8oz or 1oz sizes. If you’re new to it, you might start with the 1oz kit, which also measures out the proper mixture for you.
– Color sprays: Guava, Sky (Stephanie Barnard for Clearsnap)
– Kitchen sponge
– Plastic/latex gloves
– Craft sheet (Ranger)
– Book paper
– Stamp: Invoke Arts
– White, off-white, black cardstock
– Black brads
– Black inkpad
– Small Zots™ (available at Paper Wishes)
– White blank card (mine is 7 1/2″ x 5 1/4″)
A note about your work surface: I use Ranger’s craft sheet to protect my table because I can re-use it again and again—wet resin can be cleaned off with a baby wipe, and any dried resin drips can be scraped off with an old hotel key card. If you don’t have a craft sheet, you can also cut apart a plastic garbage bag. One side of your paper will have a slight texture from the plastic bag (which may or may not concern you) and you will need to toss it when you’re done.
Here’s how to make the card:
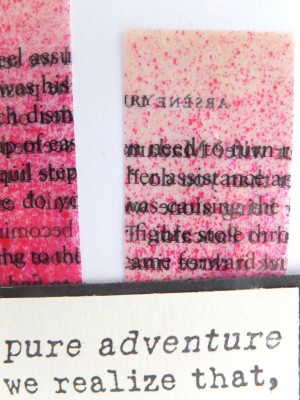
1. Spray a sheet of book paper with Guava. Let dry, or heat-set.
2. Mix one ounce of resin epoxy according to the manufacturer instructions. Place the sprayed book paper on your craft sheet and dip the sponge into the resin. Work from the center of the paper to the outer edges, spreading the resin with the sponge. When you’ve coated the front of the paper, flip it over and coat the back. Let dry.
Note: A one-ounce mixture of resin allows you to coat several pieces of paper—I keep a small pile on hand (and an extra craft sheet) so I can use up all of the resin I’ve made.
3. Spray white cardstock with Sky. When dry, trim slightly smaller than the card front and glue.
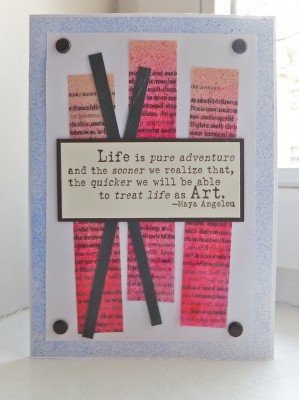
4. Cut the resin paper into three 1″-wide strips. Use Zots™ to attach them to a piece of white cardstock. Cut two 1/4″-wide strips of black cardstock and glue them on top. (I used a glue stick for that.)
5. Stamp the quote on off-white cardstock and mat on black. Glue as shown.
6. Add brads at each corner of the white cardstock, then glue to the card front.
Here’s a close-up:
Want to see the video tutorial? Then pop on by Studio SN on You Tube! See you there!


