
I haven’t played with pigment ink for a long time—I mean, a really long time. I’ve gotten so used to quick-drying dye-based ink and forgot how lovely it is to brayer and blend and even stamp with slow-drying pigment ink. And since I’ve set up my studio so my heat tool is always out, it’s quick and easy to heat-set those slow-drying colors.
Pigment ink is also really great for using with stencils—because it’s slow-drying, you can do a fun “stamping with stencil” technique and clean your stencil before everything dries.
Check it out!
Materials:
– Honeycomb stencil (Crafter’s Workshop)
– Inkpads: Pool Limited Edition Pigment, Cupid Limited Edition Pigment, Purple Crafter’s (Clearsnap)
– Stamps: ESN03 Eclectica set (Paper Artsy)
– Easy Scalloped Frames template (Hot Off The Press)
– Pink, teal cardstock; glossy white cardstock
– Other: sheer maroon ribbon, purple brads, blending foam (or cosmetic wedge), foam tape
– Brayer, heat tool
– Blank 5″x6 1/2″ card
Instructions:
1. Use the brayer to apply Cupid and Pool ink to a 5″x7″ piece of glossy cardstock, keeping the two colors separate.
2. Place the honeycomb stencil on a craft sheet or scrap paper and press the Pool ink onto the stencil. Turn it over and “stamp” it onto the Cupid portion of the brayered cardstock by pressing it onto the cardstock and brayering across the top with a clean stencil. Repeat, “stamping” Cupid ink onto the Pool area of the brayered cardstock. Stamp the script design with Purple ink. Dry with a heat gun.
3. Use the Scalloped Frames template to trace and cut a scalloped edge on the brayered cardstock. Apply Cupid ink to the edges with a piece of blending foam. Heat-set.
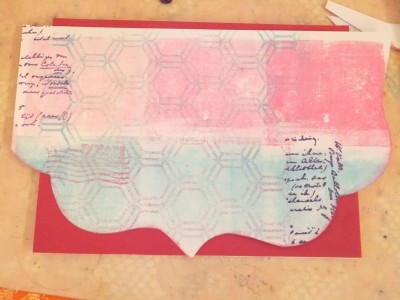
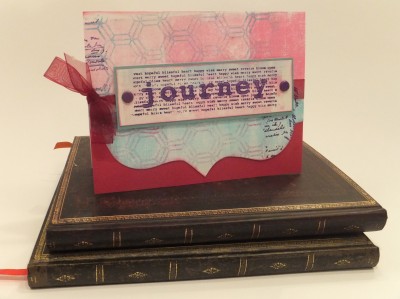
4. Cover the card with pink cardstock and glue the scalloped piece to the card front, trimming off the excess. Wrap the entire card front with sheer ribbon, tying in a bow on the left side.
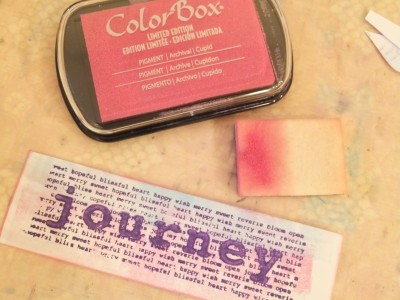
5. Use the brayer to apply Cupid and Pool ink to a 51/4″x1 1/2″ piece of glossy cardstock, keeping the two colors separate. Stamp “journey” with Purple ink. Apply Cupid ink to the edges with a piece of blending foam. Heat-set, then mat on teal cardstock.
6. Insert a purple brad at each end and add to the card front with foam tape.
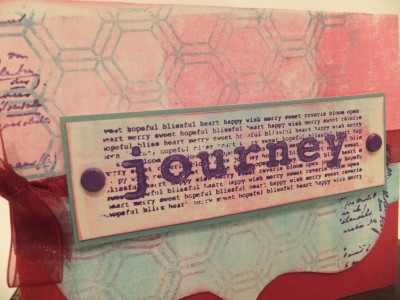
A quick design tip: Notice how the background is colored at the bottom with Pool and Cupid at the top—and the “journey” focal has Pool in the top area and Cupid at the bottom.
Happy Wednesday!


