
Last weekend I was all about paper tole, writing an article for the Spring 2014 issue of CardMaker magazine. People often ask me about writing for magazines, and they’re usually surprised by the process behind it…so I thought I’d share my 10 steps for writing a craft magazine article. Ready?
Step 1: Determine the topic. The editor, Tanya, and I decided on paper tole as a topic because it’s well-known in Europe and England but not so much in the US. Magazines want to present trends and techniques that are new and interesting to their readers, so editors are constantly scouting for topics.
Step 2: Determine the twist. My job is to figure out how to present a topic or technique in a way that appeals to the magazine’s readers. Every magazine has a certain style and a certain type of reader, so I need to develop a piece that shows something new while still maintaining the magazine’s focus.
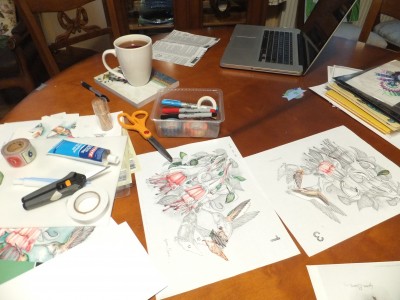
Step 3: Outline the projects. This is the proverbial blank page, where I get to pull supplies and think up the format for the piece. BUT! I need to make sure I’m using supplies that are available—this is the key—when the magazine comes out.
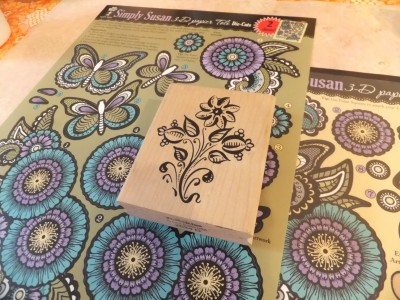
This means connecting with manufacturers to see whether they expect that stamp/paper pack/pen to be available in Spring 2014. If not, I can’t use it—it’s way too frustrating for readers to see a product they can’t get any longer. The materials also need to be available at craft stores or online. And last, the supply list has to be manageable…not a list of 45 products that end up costing readers $100 to make a card.
Step 4: Design the projects. All projects need to be kept to a reasonable number of to-do steps…first, because magazine space is limited, and also because most people get discouraged when skimming over a 20-step project. I also want to use easy-to-duplicate measurements with minimal fractions—”Cut a 2″x3″ piece” is easier than “Cut a 1 15/16″x 2 3/8″ piece”!
Another thing to keep in mind? If the projects will all be photographed on the same magazine page, they also need to coordinate, in color and style, so they look cohesive.
Step 5: Write instructions. I keep a notepad handy to jot down the steps as I do them. Then I type them up as soon as I finish the project, otherwise it can be tricky to decipher my notes. Usually I also need to write a short intro for each project, and a couple of designer tips. Of course things are a little different when I’m writing for UK magazines…measurements are in centimeters and “color” is “colour”…spell check, please!
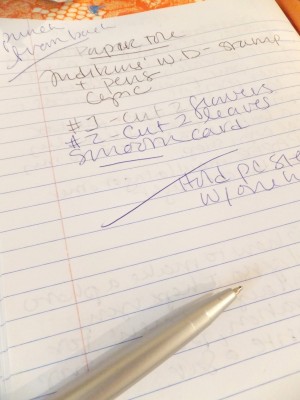
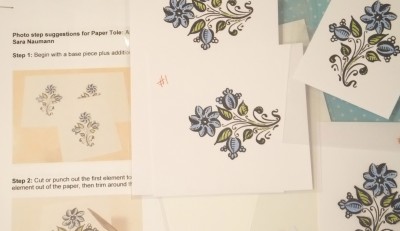
Step 6: Assemble any step photo materials. Sometimes I need to prepare materials for step photos—these are made, labeled (#1, #2, etc) and bagged separately. I then shoot the steps, print them out and include them as suggestions for the magazine’s photographer. This way, the editor and photographer can show the steps as I’ve suggested, or adapt the materials to their own space. Sometimes they don’t use them at all, but it’s better to have more options than not enough!
Step 7: Edit. I usually wait a day before reviewing the article—I re-read everything (out loud), then double-check the order of steps and the measurements.
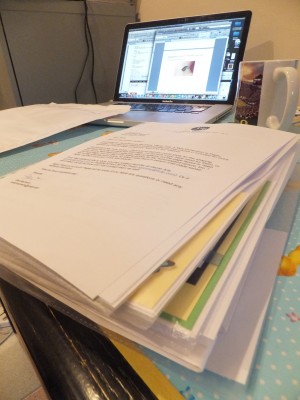
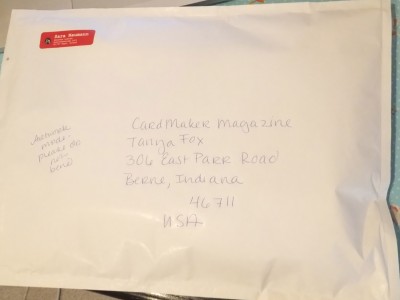
Step 8: Prep for mailing. The projects are mailed to the magazine for photography. Each one is labeled, then placed with printed instructions inside a plastic page protector. Step materials, cover letter, extra tools or supplies the photographer might need—everything is put into a bubble mailer or box so it’s well-protected against the elements and sent off.
Step 9: Send it off! Now just to get the package in the mail (with tracking number) to arrive at the editor’s desk at least a few days before her deadline. Because I mail internationally, I usually back things out at least a week, usually two. It’s easy to be get surprised by foreign holidays where the postal service is closed! (January 6 is Epiphany Day in Poland, for example, so I can forget about the post office.)
Step 10: Enjoy the surprise of seeing the piece in print! By the time the article is published, I’ve usually forgotten about it…so it’s great fun to see the piece in print. Magazine photography is always so much better than mine, and I love seeing if they’ve used props or how they arrange the pieces.
Hope you enjoyed this glimpse into my studio! Happy Monday!
Wow! Thanks for sharing. It is not as easy as it looks!
I think most jobs are that way…it’s always fun to see behind the scenes!