
Happy November! (I can’t believe it’s November already!)
Today on Studio SN on You Tube, I want to share a technique I really enjoy: Paper Piecing Stamped Images. It’s one of those classic techniques that never goes out of style, but one that we (okay, I) can tend to forget about.
It’s really simple: Just stamp your image in black and white, then stamp it again multiple times on colored cardstock. Cut these apart and glue them on top of the original image. Do as much or as little as you want—you can glue the elements flat or use foam tape.
For this card, I’m using the Up & Away Bear Balloons design from My Sentiments Exactly. It’s such a sweet design and with lots of open areas, it’s perfect for paper piecing.
Paper Piecing Bear Card, what you need—
- Up & Away Bear Balloons stamp set from My Sentiments Exactly
- Black ink
- Load & Fold stamp positioner from Rare Earth
- Cardstock: White, green, blue, yellow, black, kraft
- Bakers twine
- Glue stick
Paper Piecing Bear Card,, how to make it—
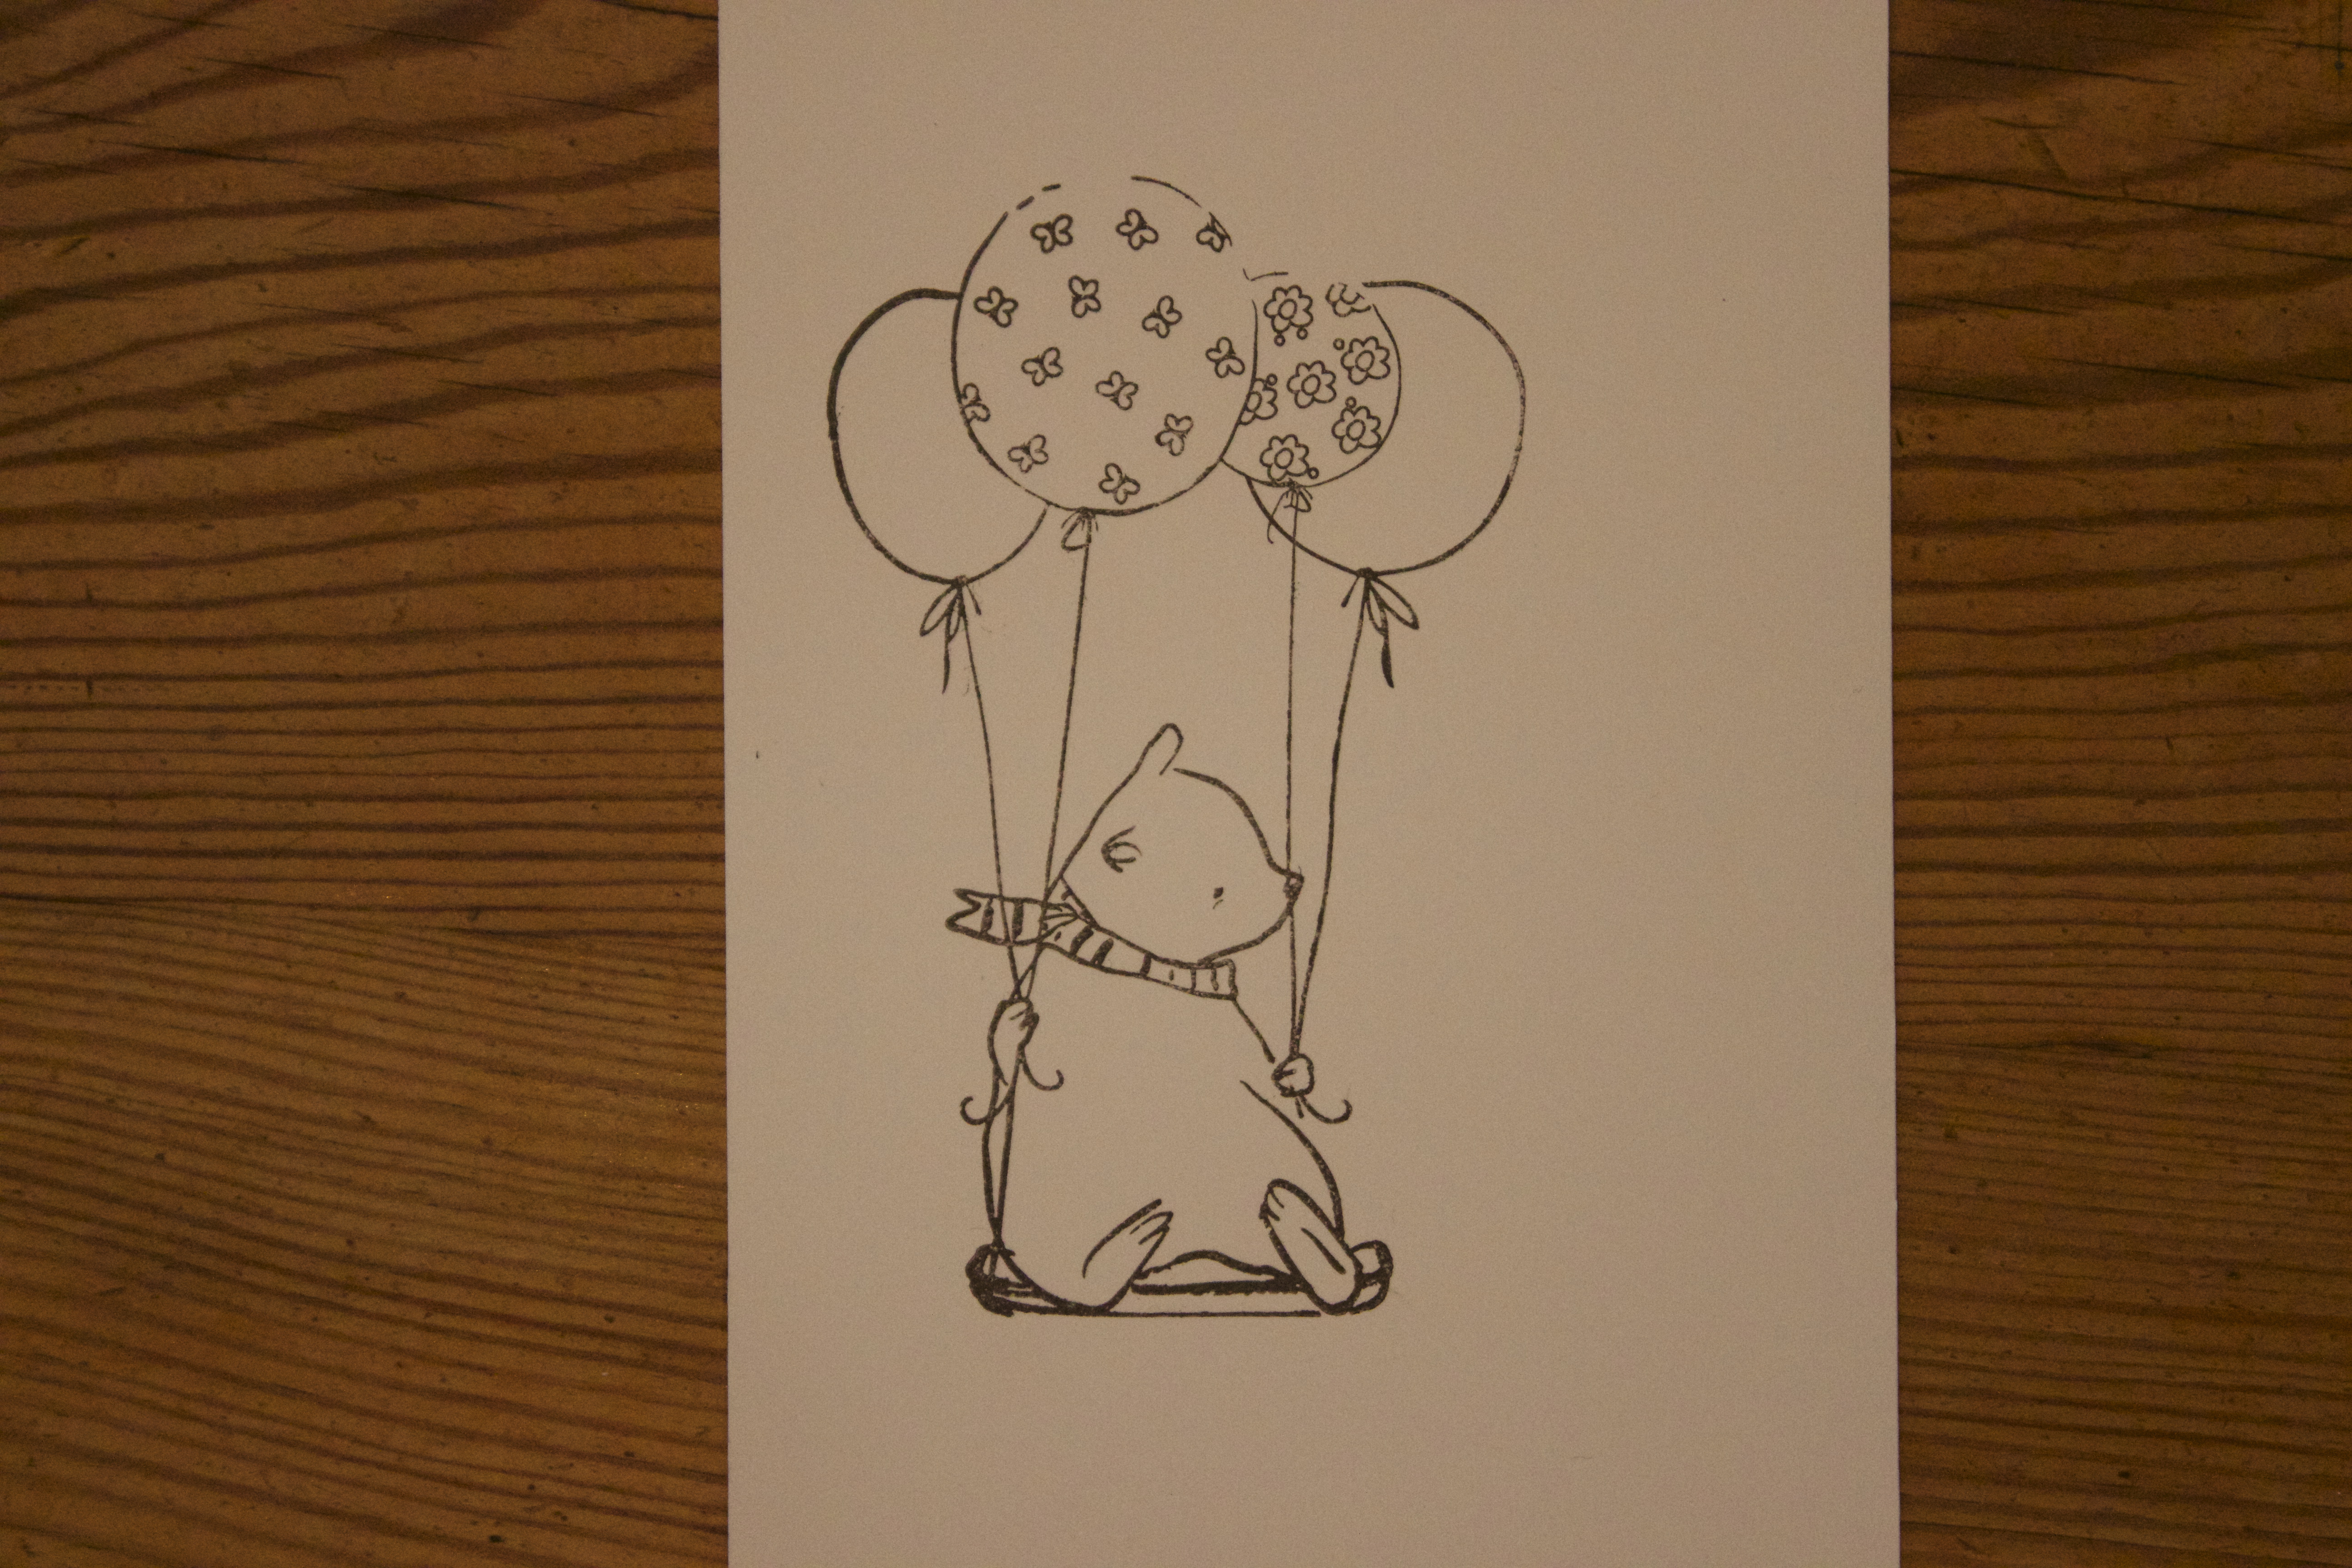
Stamp the bear image onto white cardstock, using black ink. I use the Load & Fold, but you can use any acrylic block. (Note the open areas at the top of the balloons…those are part of the overall sketchy design of this stamp series!)
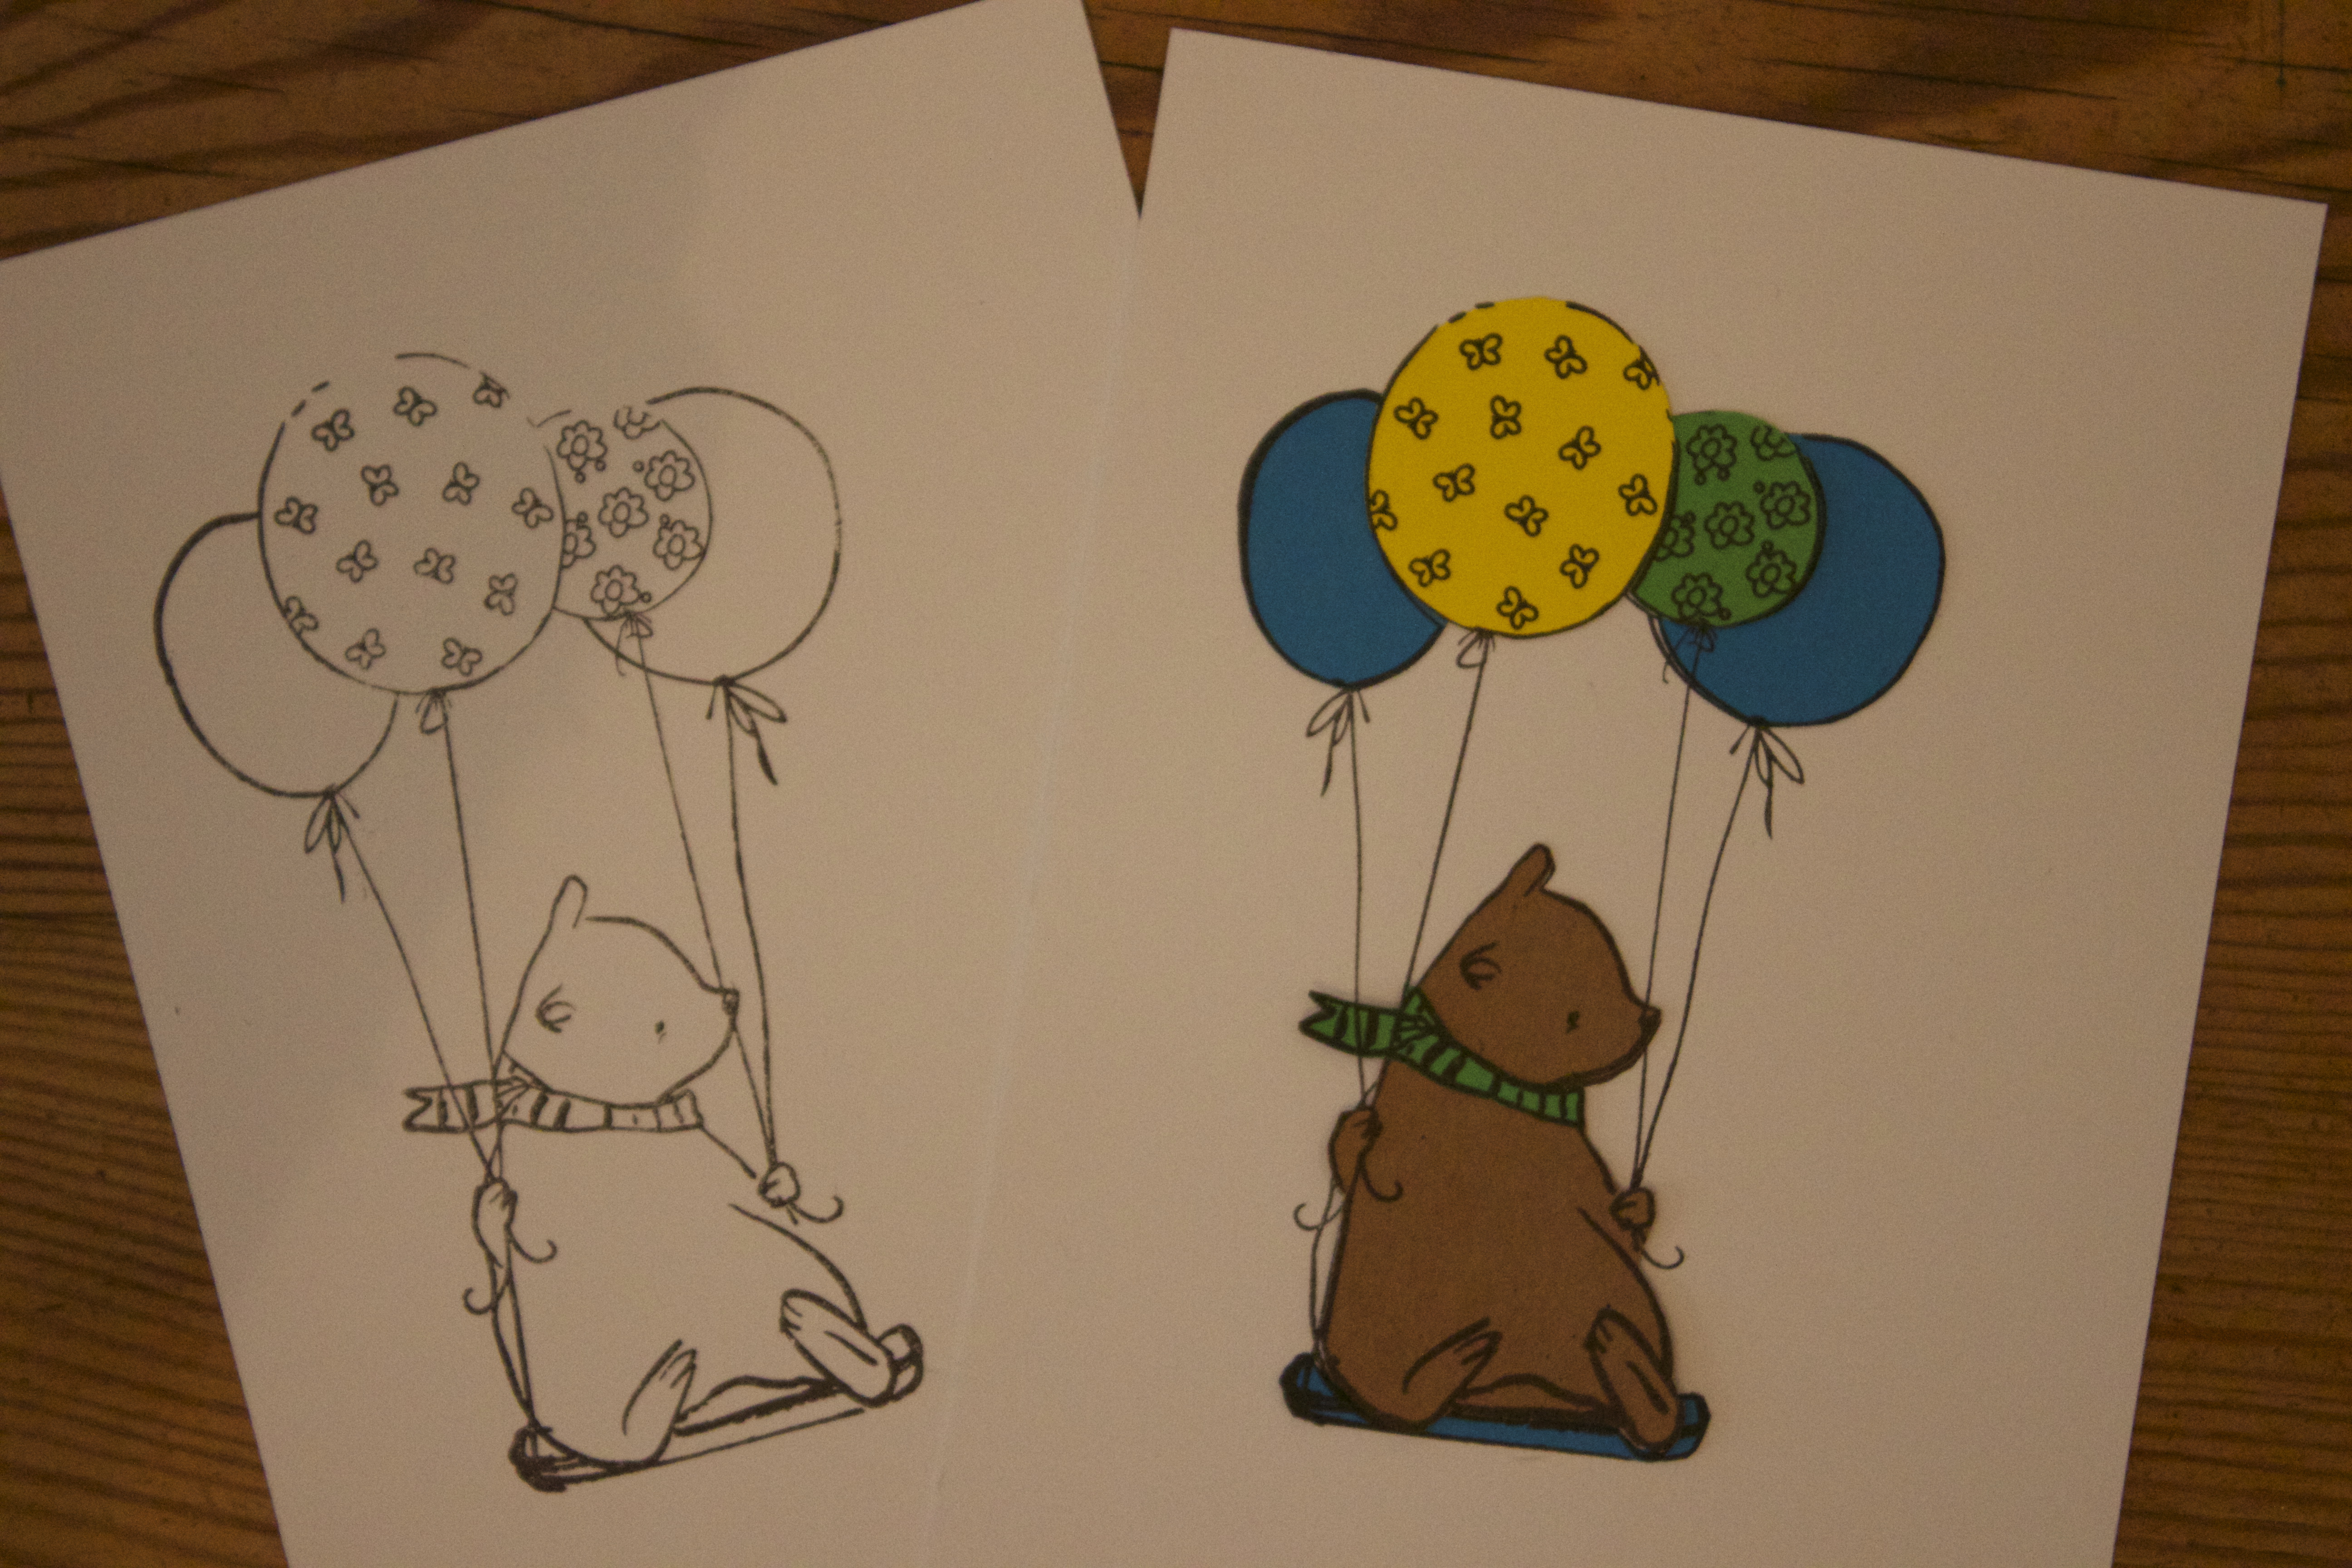
Stamp the image again onto green, blue, yellow, and kraft cardstock. Cut out the various parts of the image:
The bear from kraft
Two balloons from blue
One balloon from yellow
One balloon from green
The bear’s seat from blue
The bear’s scarf from green
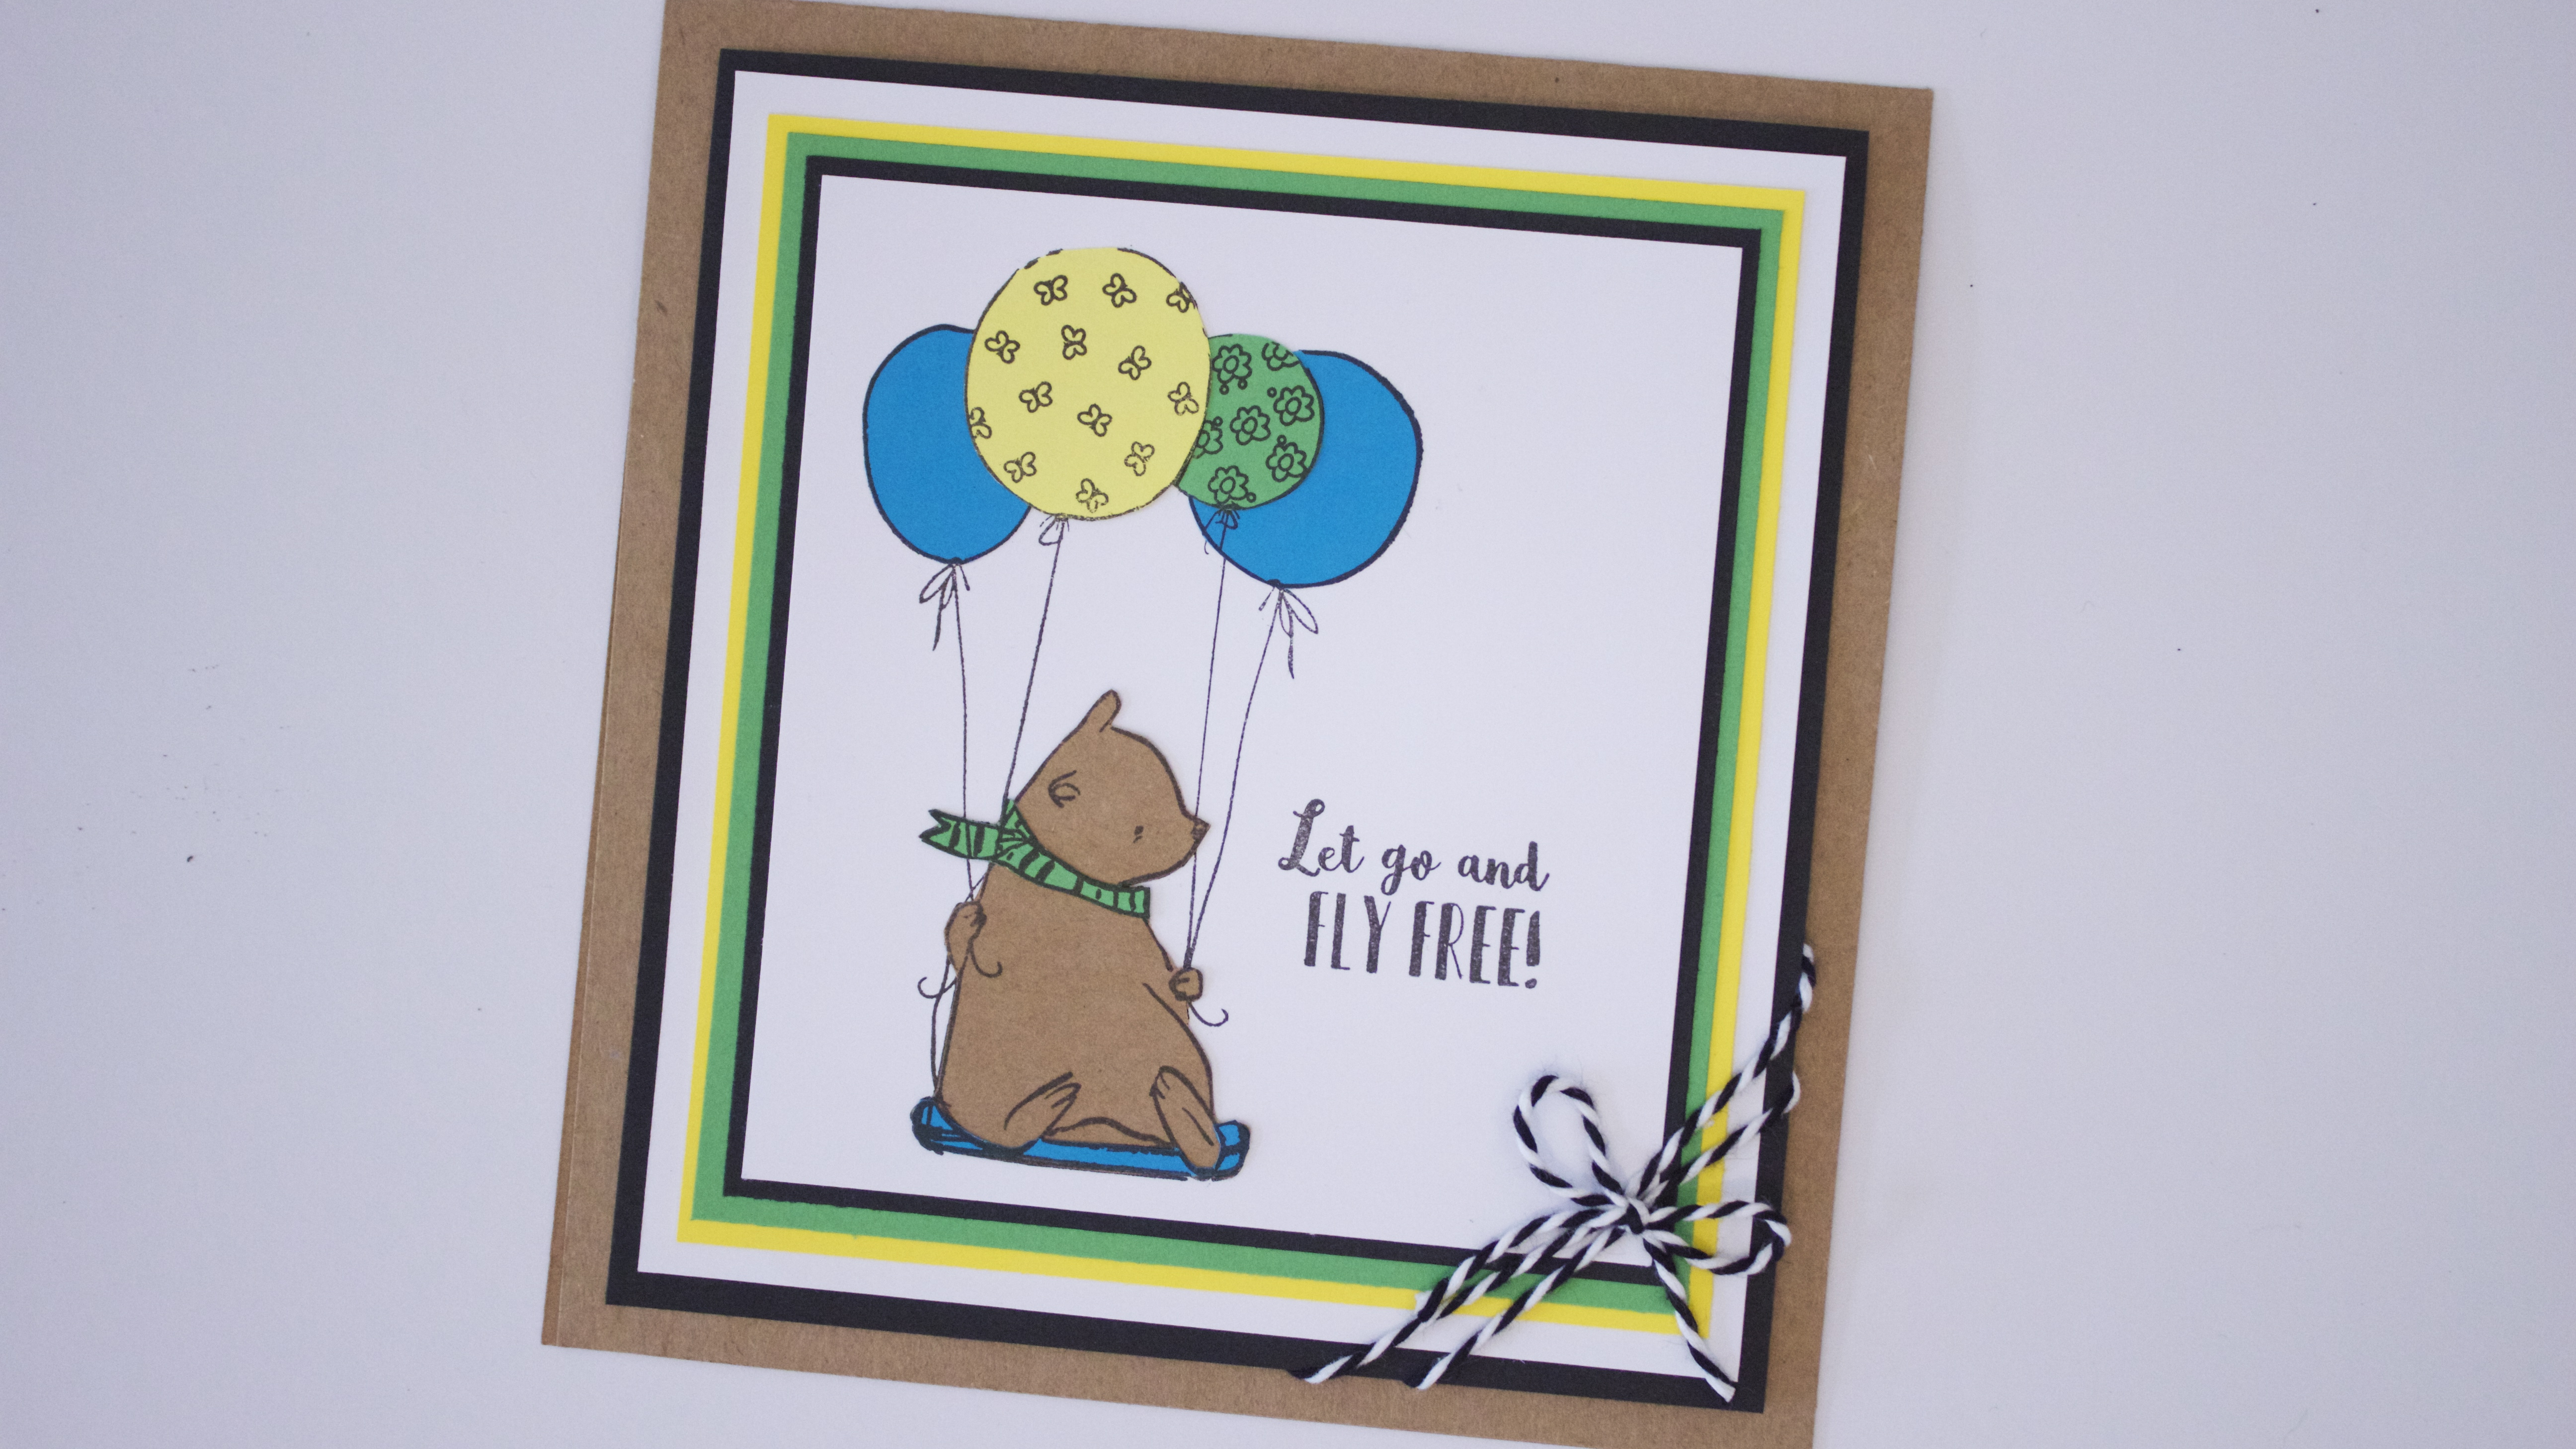
Use the glue stick to adhere the pieces to the original black and white stamped image. (Be sure to glue the balloons starting from either side, then add the yellow one last as it’s visually in front of the bunch.)
Mat the image on black, green, yellow, white and black cardstock. Wrap the bottom corner with bakers twine, then glue to the front of a kraft card base.
Like this technique? Then be sure to watch the Paper Piecing Stamped Images video on Studio SN on You Tube!


