
Welcome to Washi Tape Tuesday! Love washi tape? (Or maybe you have a stash that you want to put to use?) Then join me for tips, techniques and ideas for adding washi tape to your handmade cards!
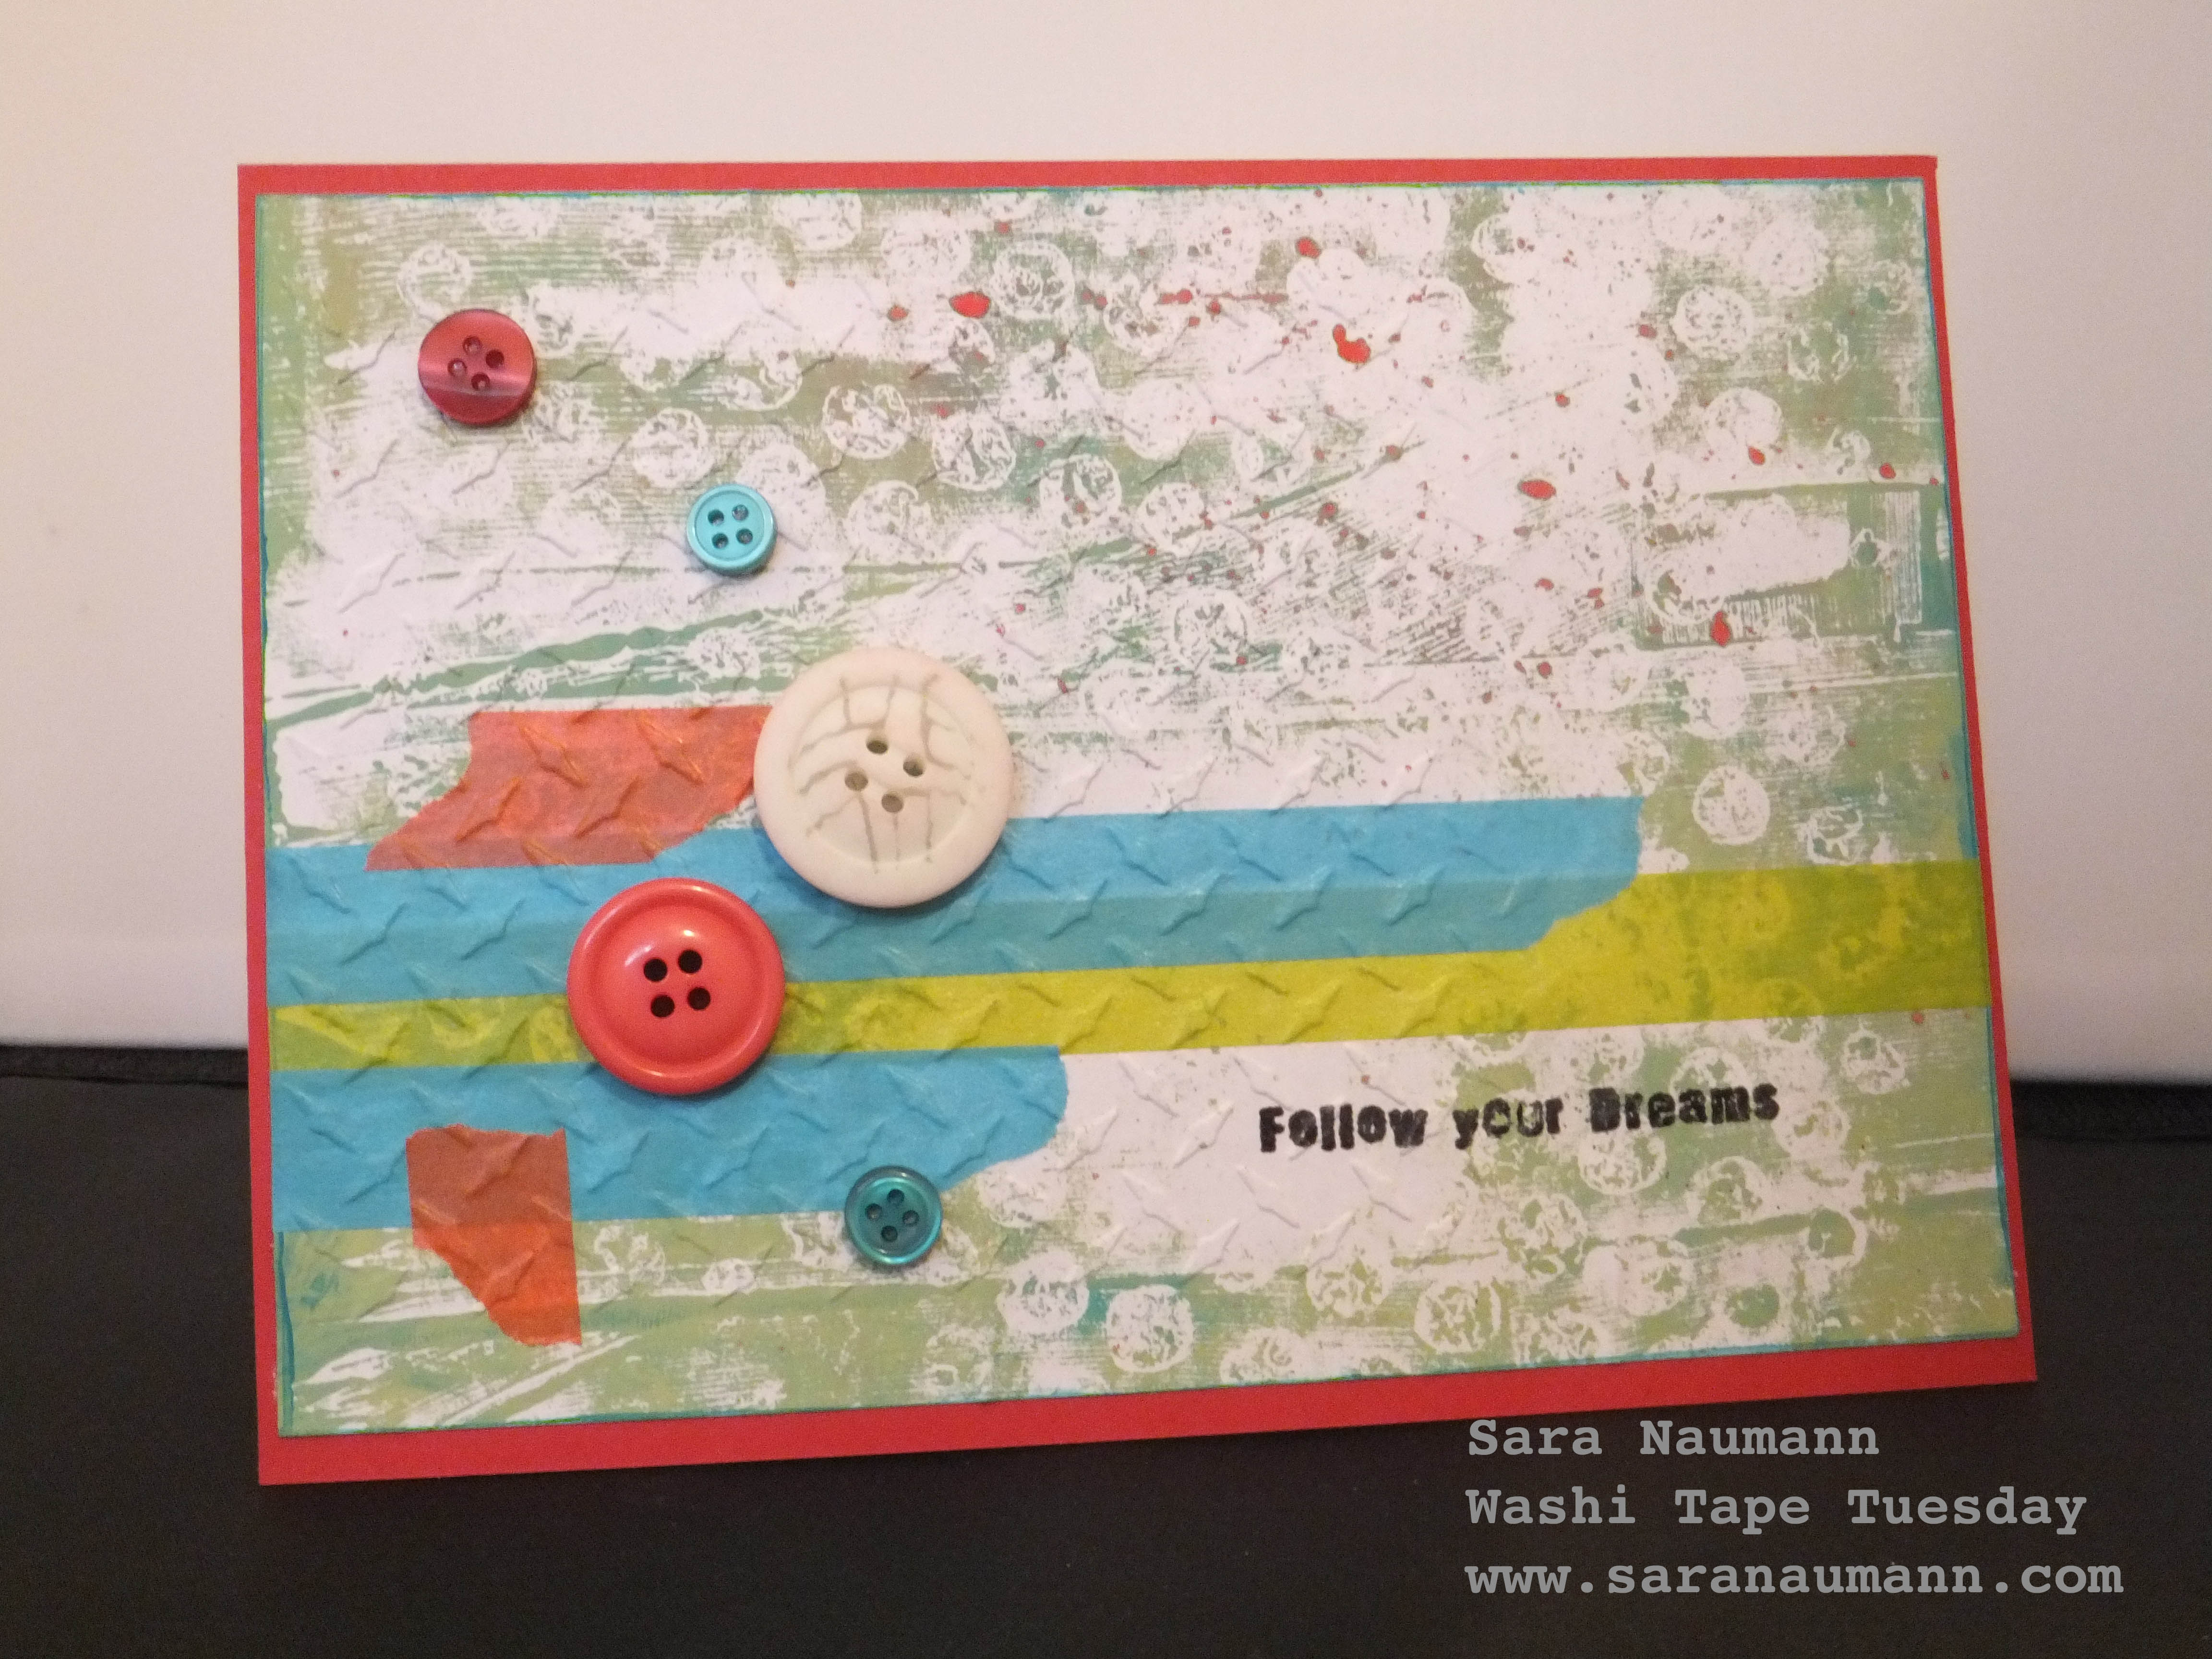
This week I’ve been working on a monoprinting article for Crafts Beautiful magazine and ended up with a lot of cool printed papers—so I decided to incorporate washi tape and some embossing plate action into the mix!
Washi Tape Monoprinted Card, what you need:
– Monoprinting plate: Creative Palette from Stampendous
– Acrylic paints: London Bus, Beach Hut, Guacamole (PaperArtsy)
– Glaze medium: Satin Glaze (PaperArtsy)
– Embossing folder: Diamond Metal Plate (Hot Off The Press)
– Bubble wrap
– Small brayer, stipple brush
– Solid washi tapes: MT
– Buttons
– Stamps: Collage (WOW Embossing)
– Black ink
– White printer paper, red cardstock
Washi Tape Monoprinted Card, what you need:
1. Make the monoprinted background: Squeeze 2-3 drops of Beach Hut and Guacamole paint onto the monoprinting plate. Add one drop of Satin Glaze, then brayer to blend across the palette. Place the bubble wrap into the wet paint and lift, removing the paint from the palette. Use the stipple brush to spatter London Bus paint, mixed with glaze, onto the palette.
2. Work quickly—place a sheet of printer paper onto the palette and smooth with your hand. Lift to reveal your print. If your paper sticks to the palette, it’s probably because you don’t have enough paint, or the paint has started to dry. This is why the glaze is important…to keep your paints “open”—or wet—longer.
Note: I use regular office printer paper to make my monoprints. You can use more expensive paper but I’ve found printer paper is inexpensive, readily available and works perfectly.
(Once you’ve made one print, you can add more paint or glaze to your palette and keep printing!)
3. When the piece is dry, trim slightly smaller than the card front and edge with Beach Hut. Stamp “follow your dreams” at the bottom right corner. Add washi tape strips as shown.
4. Place the paper inside the embossing folder. My paper is bigger than the folder, so I’ve only embossed a portion of it—mainly, where it would show up on the washi tape.
Note: Plain or solid-color washi tapes are better at showing up the embossing plate pattern.
5. Cover a card front with red cardstock and glue the monoprinted piece in the center. Add buttons.
Love washi tape? Want tons of ideas, techniques and card projects? Twenty to Make Washi Tape Cards is packed with 20 washi tape projects, each with complete step-by-step instructions—PLUS 20 alternate card ideas…you get 40 creative washi tape card project ideas in all. Available from Search Press, this instruction book is the perfect thing for cardmakers who love washi tape! Click the video below to learn more!


