
Today on Studio SN on You Tube: Alcohol Ink Monoprinting!
I think this technique is one of my all-time favorites. It’s so easy to do and gives a soft, subtle look and a different effect every time!
Here’s what you’ll need:
– Alcohol inks: Beach Bellini, Sailboat Blue (Ranger)
– Blending solution (Ranger)
– PA1010EZ Stamps from Paper Artsy
– Jet Black Archival inkpad (Ranger)
– Plastic (packaging or sheet protector)
– Glossy cardstock
– White, blue, cream cardstock
– Cream grosgrain ribbon
– Foam tape
Here’s how to do it:
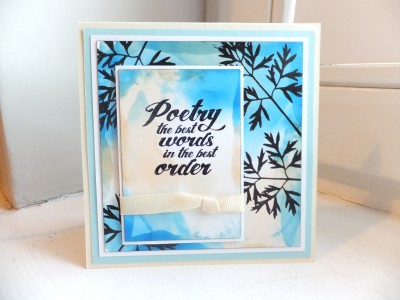
1. Apply a few drops of alcohol ink onto a piece of plastic. Add a few drops of Blending Solution. Press a 4 1/2″ square of glossy white cardstock into the ink, glossy side down. Place another piece of plastic on top and smooth. Lift and remove the cardstock. Repeat if desired to cover the entire piece.
2. Stamp the leaves around the edges, using black ink. Ink the edges of the piece, then mat on white, then blue cardstock. Glue to the front of a 5 1/8″ cream card blank.
3. Repeat the monoprinting technique on a 3 1/2″ x 2 1/2″ piece of glossy white paper. (You can use the same plastic.) Ink the edges, then mat on white. Tie a knot in a piece of cream ribbon and wrap around the piece. Add to the card front with foam tape.
Want to see the video tutorial? Just stop on by Studio SN on You Tube!


