
Today on Studio SN on You Tube: Christmas Cardmaking with Dylusions!
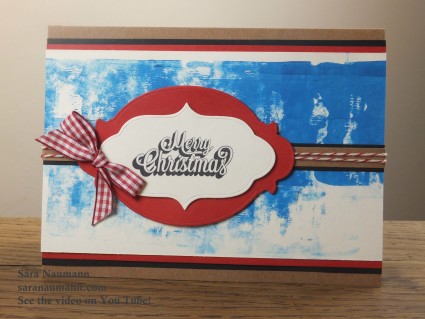
Here’s a fast and easy technique for adding quick color and texture to your Christmas cards. The pretty blue you see here is simply a brayered application of paint. It’s easy to do and perfect for making cards in batches. Brayer several sheets of cardstock, let dry and—voila!—you’ve got plenty of papers for Christmas cards!
Christmas Cardmaking with Dylusions, what you need—
- Dylusions London Blue paint (Ranger)
- Naughty & Nice Christmas Sayings stamp set (Hot Off The Press/Paper Wishes)
- 6 Layered Labels & 2 Swirls Cutting Dies (Hot Off The Press/Paper Wishes)
- Brayer (Ranger)
- Cardstock: Off-white, kraft, black, red
- Jet Black Archival ink (Ranger)
- Foam tape
- Red gingham ribbon
- Red and white baker’s twine
- Kraft card base
Christmas Cardmaking with Dylusions, how to do it—
- Cut a 4”-wide strip of off-white cardstock. Apply paint to a palette or craft sheet, then brayer across the cardstock, leaving some off-white showing through. Let dry.
- Mat the long ends on red, then black cardstock and glue to the front of the kraft card base. Cut a narrow strip of kraft cardstock and mat the long edges on black, then glue to the center of the card front. Wrap the front with baker’s twine, securing the ends to the front of the card where the labels will hide them.
- Die-cut a large red label and a smaller off-white label. Stamp “Merry Christmas” with black on the off-white label. Use foam tape to adhere it to the red label, then foam-tape the layered label to the card front.
- Tie a bow in gingham ribbon and glue as shown.
That’s it—easy! To see the video tutorial, just stop by Studio SN on You Tube to watch the Christmas Cardmaking with Dylusions video.


