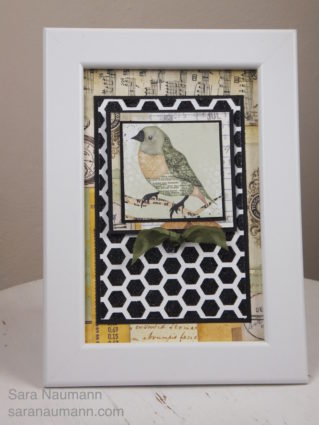
Have you ever looked at patterned paper and thought: This is so beautiful, I could just frame it? Me too! So I thought it would be fun to create a simple framed piece of home decor that could be used to personalize a house, dorm, new apartment, even an office—all with the beautiful Bo Bunny collection that I showed on Create and Craft.
The frame is an inexpensive one I picked up at IKEA. Since the bird image is mounted on foam tape, and I have a bow, I opted not to use the glass plate that normally goes with the frame. You can choose to skip the foam tape and bow if you prefer a flatter piece.
Beautiful Dreamer Framed Picture, what you need—
Bo Bunny Beautiful Dreamer collection
Bo Bunny Licorice Glitter Paste
Bo Bunny Brocade Stickable Stencil
Cardstock: White, black
Green ribbon
Palette knife
Foam tape
5”x7” white picture frame with 3 1/2” x 51/2” window
Beautiful Dreamer Framed Picture, how to make it—
1. Place the chicken wire stencil onto white cardstock. Use the palette knife to gently spread the glitter paste onto the stencil. Scrape off excess paste with the palette knife and return it to the jar. Tip: Be sure to keep the jar tightly closed when not in use.
2. Let the piece dry, then trim to 3” x 4 1/2” and mat on black cardstock.
3. Cut a piece of collage paper to the size of the frame backing, then glue the stenciled piece in the center.
4. Cut out the bird motif, then mat on black cardstock. Mat again on collage paper and on black, then adhere with foam tape.
5. Tie a knot in ribbon and glue as shown.
I originally showed this collection on Create and Craft television in the US. For more great shows and demos, please tune in by watching it live on TV or online.