Embossing powder and resin combine together for easy charms—which can then be used for jewelry, or mixed media embellishments!
(Even better: through May 1, WOW Embossing is offering 10% off embossing powders, foil, stamps, accessories, and all kinds of other WOW-branded items! Use code WOWFO10.)

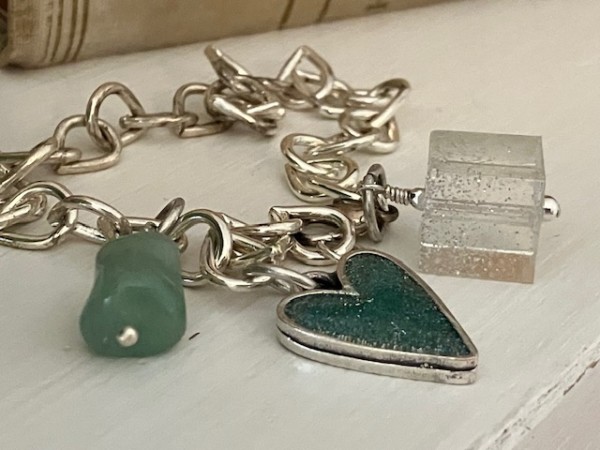
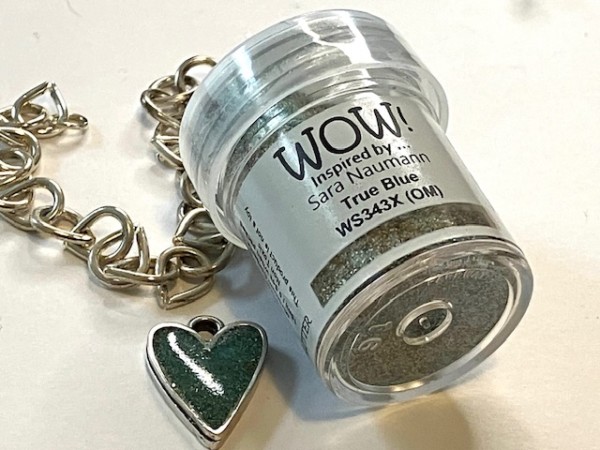
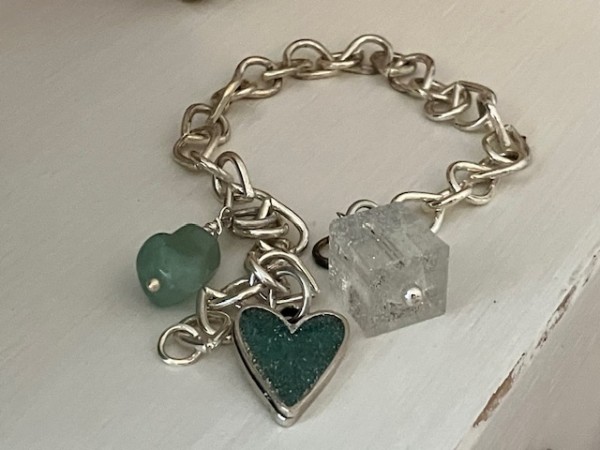
The heart charm you see above is made with resin and True Blue embossing powder, mixed and poured into a silver bezel. The square bead at the right is made with clear glitter mixed with resin and poured into a bead mold. (The bead on the left is from a bead set I got for Christmas!)
Materials Needed:
- Resin epoxy kit (including resin and hardener): I’m using ArtResin
- Embossing powder (color of your choice): Mine is True Blue from WOW! Embossing
- Heart-shaped bezel: I found this handmade bezel on Etsy from Rose Jewelry Supplies
- Mixing cups and stirring sticks, toothpick, drinking straw
- Protective gear (gloves, craft mat)
- For the clear bead, you’ll need a bead mold and clear fine glitter. You can find square bead molds on Amazon.
Step 1: Prepare Your Workspace. Before starting the creative process, ensure your workspace is well-ventilated and your table is protected with a craft mat. Use gloves when measuring and mixing resin.
Step 2: Mix The Resin. Follow the instructions provided on your resin epoxy kit to mix the resin and hardener in a designated mixing cup. Stir the mixture thoroughly but gently to avoid introducing air bubbles into the resin.
Step 3: Add Embossing Powder. Once your resin epoxy mixture is ready, it’s time to add the embossing powder. Start with a small amount, stirring it into the resin mixture. Add more if needed. Stir gently to ensure the embossing powder is evenly distributed.
Step 4: Fill the Heart-Shaped Bezel. Place your bezel on a flat, protected surface. Use the stir stick or a toothpick to fill the bezel with resin. Take your time to ensure the resin fills the bezel evenly, and take care not to over-pour.
Step 5: Remove Air Bubbles. If you see air bubbles, point a straw toward the piece and gently blow through it. The air bubbles should burst. You may want to check again in a few minutes, and even after a half-hour or so, and repeat the process if needed.
Step 6: Let It Cure. Let the piece cure according to the instructions provided with your resin epoxy kit—with ArtResin, it will be hard to the touch after 24 hours, and cured after 72 hours.
Step 7: Use Your Heart! After the piece has dried, you can add it to your project. I have a jump ring attaching the heart to a piece of silver chain, along with a resin bead I made with clear glitter. The bead was made using a square bead mold, using the same mixing process. Both the square bead and the round green bead are attached with headpins.
Then wear, and enjoy!
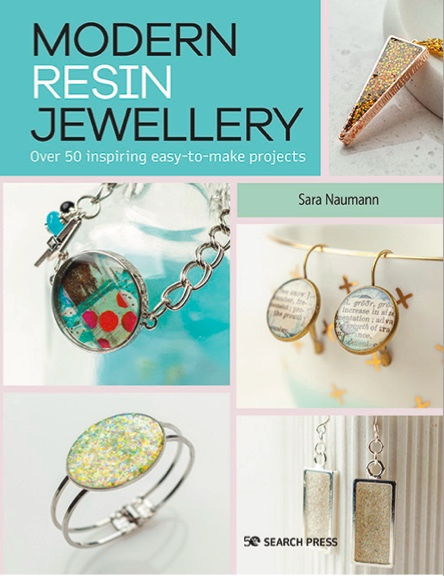
(And if you like making resin jewelry—please check out my book, Modern Resin Jewellery, from Search Press!)