
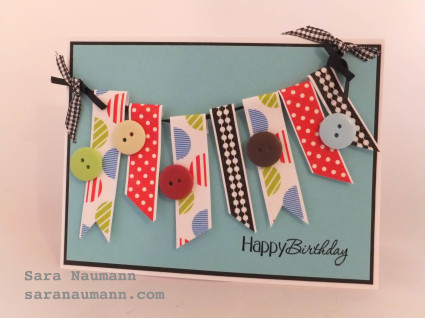
Today on Studio SN: How to Make Washi Tape Bunting!
This is one of my favorite ways to combine different washi tape colors and patterns! The design is bright and cheerful, uses lots of color and style—yet never feels overwhelming or crowded. And it’s easy to do!
How to Make Washi Tape Bunting, what you need:
– Washi tapes: Red with dots, multicolored circles, black patterned
– Black gingham ribbon
– Black satin ribbon
– Colorful buttons
– Greetings & Labels stamps: Hot Off The Press
– Ebony Super Fine embossing powder: WOW Embossing Powder
– Cardstock: Teal, black, white
– Blank white card
– Chopstick or pencil
– Clear tape
– Foam tape
How to Make Washi Tape Bunting:
1. Place washi tape on strips of white cardstock. Cut one end of each strip at an angle or inverted “v”; cut the other end evenly. Gently wrap the even end around a chopstick or pencil to create a curve or hook.
2. Stamp and emboss “happy birthday” on teal cardstock, then mat on black cardstock.
3. Place a black ribbon across the cardstock piece and figure the positioning of your washi tape strips. (Tip: Take a quick photo to remember the positioning!) Use clear tape to secure one end of the ribbon to the back of the cardstock.
4. Use foam tape to secure the washi tape strips. Continue to add as many strips as you want, then secure the other end of the ribbon to the other side of the cardstock.
5. Add knotted pieces of ribbon and buttons to the piece.
6. Glue to the card front.
Want to see the video tutorial? Come on by Studio SN on You Tube to see How to Make Washi Tape Bunting!


