{Project} Wednesday: Stamping & Stenciling with Eclectica

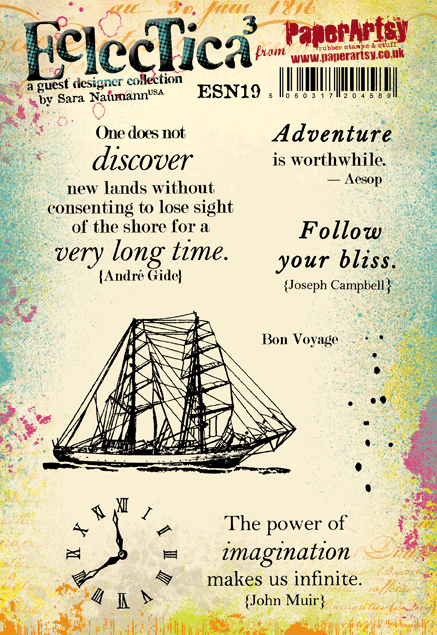
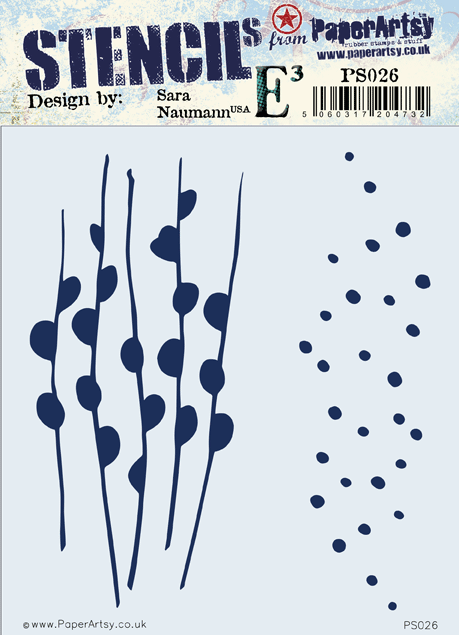
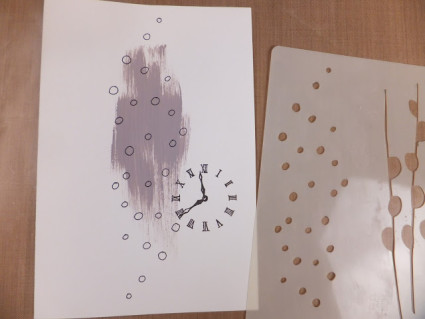
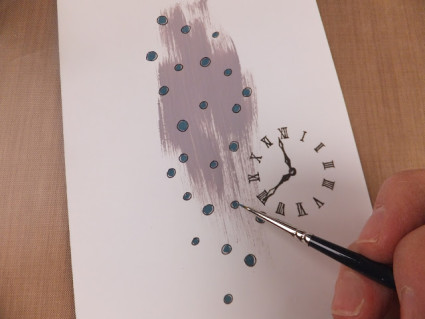
This month, I’m so pleased to announce several NEW releases with PaperArtsy! Yay—this time we’re offering you not only two new stamp sets, but also two new stencils. They’re shipping out to retailers near you (and online) now so it’s the perfect time to share some creative inspiration. Today I’ll share a project using ESN19 stamps and the PSO26 stencil. Next week we’ll look at the other two!

This new stamp set is a combination of some of my favorite quotes and images. I’ve been wanting to do a “masculine” type of stamp set for awhile—something with cool quotes and images that can work for masculine cards and projects, without being too limiting. Of course the “discovery/adventure” theme is really versatile for any person or occasion—I love the idea of the “follow your bliss” stamp for a graduation or new job.

Sara Naumann Eclectica Stamps ESN from PaperArtsy
And the stencils? How cool are they??? PaperArtsy stencils are made from a slightly thicker plastic than most stencils on the market, which makes them perfect for use with any kind of texture or paste because it doesn’t seep underneath. (Try Grunge Paste if you’re looking for a good one.)
Eclectica ESN Sara Naumann stencils PaperArtsy
Okay, shall we make a card? 🙂
I wanted to see how this stencil could work combining both images as a layered background, using paint and penwork to add color and depth. And the quote is one of my favorites!
Sara Naumann Eclectica stamps PaperArtsy
Let’s look at the steps—
Imagination+stencil+clock
Step One: First I mixed a bit of Nougat Fresco Finish Chalk Acrylic Paint with London Night to create a slightly lighter color, then dry-brushed it onto the white cardstock. The clock is stamped with black ink. After the paint dried, I flipped the stencil over so the dots were on the left and traced them onto the cardstock with a fine-tip black pen. (I used a Micron 05.)

Imagination+Stencil

Step Two: Now just use a tiny brush to fill in the dots with Space Cadet paint.

Imagination+stencil+paint

Step Three: Paint a piece of book paper with Nougat, then blot off some paint so the words still show through. Use a pen to trace the “blobs on sticks” part of the stencil—this is what Leandra calls it, but in real life they were pussywillows. Ha!
Remove the stencil, then follow the traced lines again with pen for a hand-drawn look. Paint with Tinned Peas. Let the paint dry, then cut out three of the stems.
Sara Naumann Eclectica stamps PaperArtsy
Step Four: Tear pieces of book paper and glue them as shown. Layer the pussywillow/blob stems on top, then add the stamped quote on foam adhesive for a little lift. Tie a bow in gold silk ribbon to pick up the warm tones in the book paper and to contrast with the green and blue paint. Mount it on black, then white.
Okay, so for a video! You can see loads of projects from several designers by watching Leandra’s introductory video here:

 Enjoy!
Share It

Got Something To Say:

Your email address will not be published. Required fields are marked *

Back to top