
Today on Studio SN: Stencils & Embossing with Balzer Designs!
I’m delighted to be a guest blogger over at Julie Fei-Fan Balzer’s blog today. I’ve worked with Julie on Scrapbook Soup a couple of times—she’s a fun, down-to-earth and very smart designer whose work I really admire. For lots of good stuff from Julie, check out her podcast called Adventures in Arting and her blog. You can also see her book, DVDs and more on her website. And of course, she’s got some fabulous stencils. 🙂
Now, onto the project!
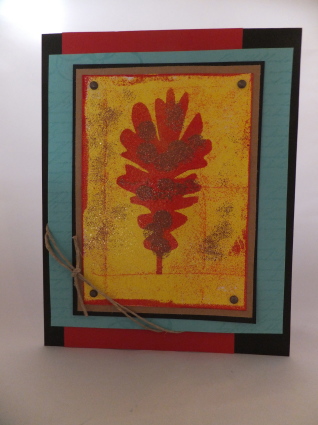
Pattern Leaf Stenciled Card
I love combining stencils with heat-embossing—it’s a great way to add texture, shine and dimension. It also gets double duty from your stencils and embossing powders.
For this card, I’m using the Pattern Leaves. It’s one of my favorite stencils because it’s a great basic and it’s super-versatile. It’s also perfect for this stencil-embossed technique. You can check out the process with photos below—you can also watch the video tutorial!
The leaf shape is stenciled onto a heat-embossed background, so let’s start there and build our way up. All the embossing powder I use is from WOW! Embossing Powder.
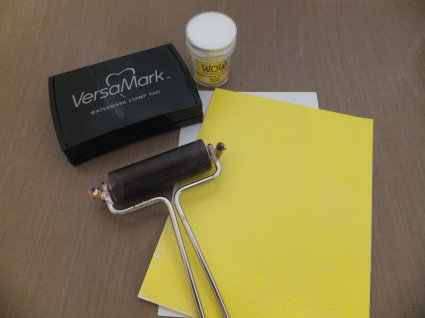
First, brayer embossing ink thoroughly onto a piece of white matte cardstock. Immediately sprinkle with Opaque Primary Sunny Yellow embossing powder. Tap off the excess and heat set. Be sure to allow plenty of time for embossing, and for the melted powder to cool.
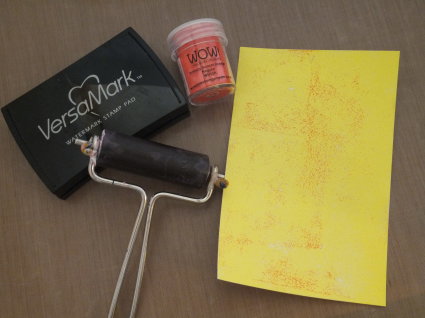
Lightly brayer embossing ink on top of the yellow and emboss with Primary Sunset Orange. Notice that I’m getting the “tracks” of the brayer. Cool!
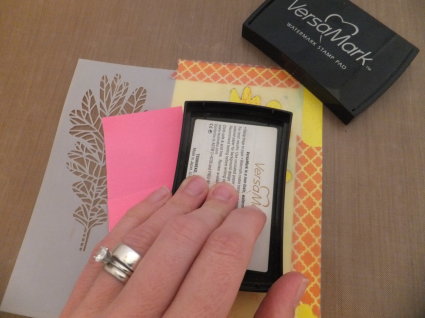
Place your stencil on top of the embossed piece. You can use any of the leaves—or all three!—but I chose the bold silhouette. You’ll want to tape it down to the embossed piece with masking, stencil or washi tape.
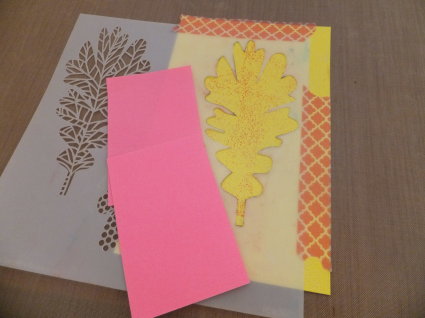
Press the embossing inkpad through the stencil. Lift off the stencil and immediately cover with Primary Apple Red. Heat set.
Voila!
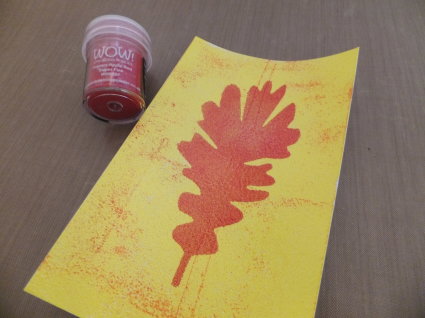
Why stop with just three layers of embossing? Use your finger to tap embossing ink onto the leaf design, then emboss with Metallic Copper Sparkle Embossing Glitter.
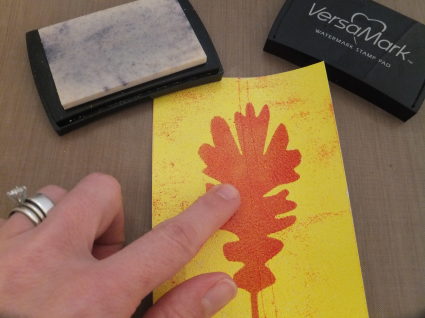
Like this!
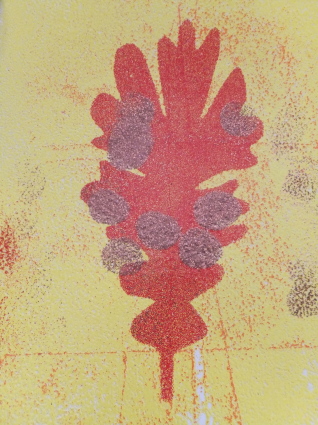
The last step? I inked the edges of the piece with embossing ink, then tapped on Primary Apple Red and heat-set it as well.
The rest of the card is very simple: Brads are at each corner, and the piece is then matted on kraft and black cardstock. The teal cardstock is stamped with the script and circles design from Eclectica ESN10. Twine goes around the corner and the entire piece is matted with red cardstock onto a black card base.
And remember, if you’d like to see the video, then pop by Studio SN on You Tube to watch Stencils & Embossing with Balzer Designs.
And don’t forget to stop by Julie’s blog and get even more inspiration on stencils, art journaling, papercrafting and more.
Enjoy!


