
Today on Studio SN on You Tube—we have a special treat, thanks to our friends at Paper Artsy, who kindly invited me to be a guest on their blog today!
What does that mean? Well, today’s Studio SN segment on Paper Artsy Eclectica Washi Tape Cards will be a bit more detailed, as I share techniques for using the Eclectica stamps on not one, but two cards. We’ll put the washi tape to good use, and get out the Spectrum Noir alcohol inks, too!
I love to explore ways to use word stamps as something more than the obvious single-word sentiment or focal on a card—it’s a great way to make the most of your stamp set and provides lots of creative possibilities! Today I’m playing with the Eclectica ESN03 stamp set.
You can watch the video for this project on Studio SN or on the Paper Artsy You Tube channel.
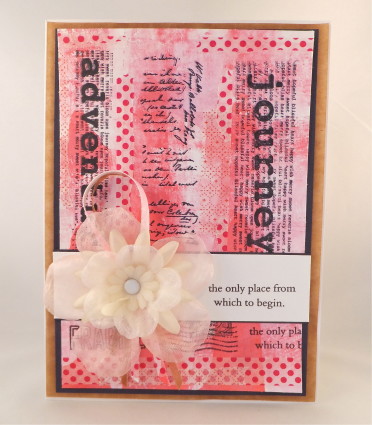
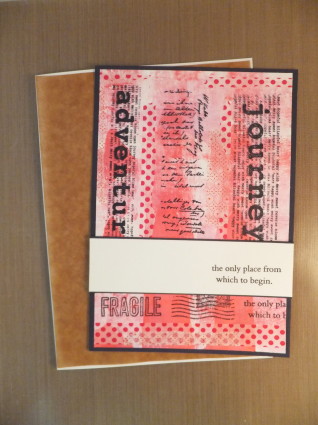
If you look at my card layout, you’ll see it’s very linear—that is, it has a lot of strong lines. The two bold stamps (“journey” and “adventure”) are on either side of a more delicate script stamp, which creates strong vertical lines. These lines are contrasted with horizontal lines: The “fragile”, postmark and partial of “the only place” at the bottom. And of course, I have a big horizontal border going across the card as well.
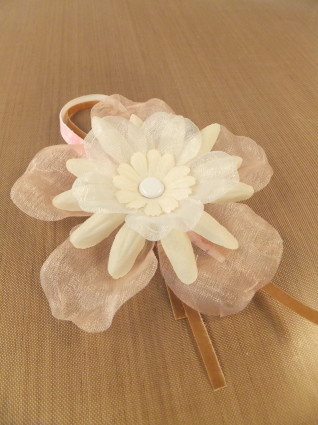
This linear effect is balanced by dotted and geometric washi tapes, which contrast with the stripey effect of my card design. Of course, the big round stacked flower also provides a definite card focal and contrast.
And in the midst of all of these design principles, you have the spirit of the stamps themselves—perfect for a bon voyage card, or simply to wish someone well on a new journey in life.
Here’s how to do it—
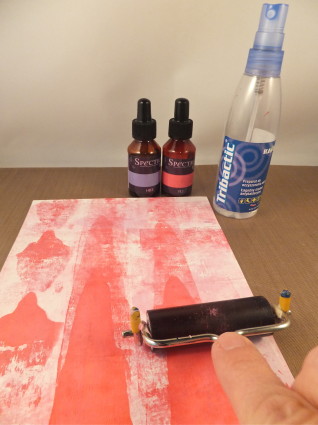
1. Squeeze a few drops each of FL1 and HB3 Spectrum Noir alcohol ink refills onto your craft sheet, keeping the colors separate. Spritz a bit of rubbing alcohol next to the ink. Brayer onto the cardstock. Repeat with the second ink color, blending and brayering both vertically and horizontally until the cardstock is as colorful as you want.
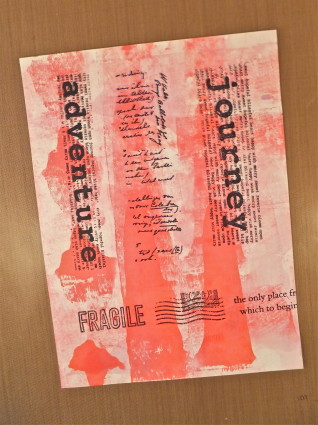
2. Arrange the Journey, script and Adventure stamps from ESN03 together on one Flexi Block. Ink with Jet Black Archival and stamp onto the colored background. Leave space between the stamps. Stamp Fragile, Postmark and “the only place” at the bottom.
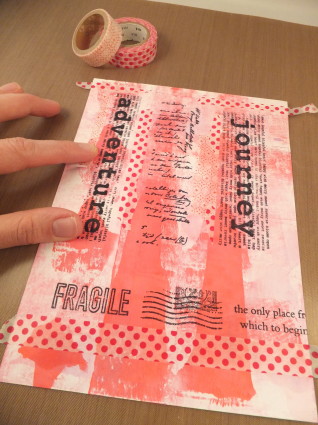
3. Add washi tape between the stamped words, tearing some and layering others.
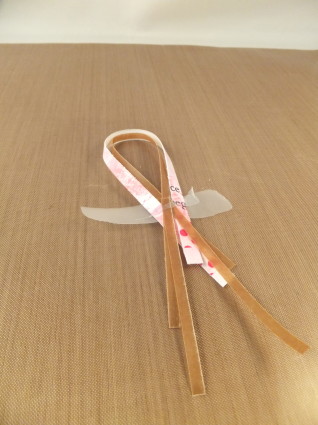
4. Trim off the excess cardstock, reserving the cut-off strips. Mat on navy cardstock. Stamp “the only place” on white cardstock, mat on blue and glue it across the background piece. Mat on Crunchy Waxed Kraft Paper and trim the excess. Glue to the card front.
4. Loop the excess strips and tape behind a stacked flower embellishment. (Mine has four silk flowers attached with a brad.)
5. Add the flower to the left side.
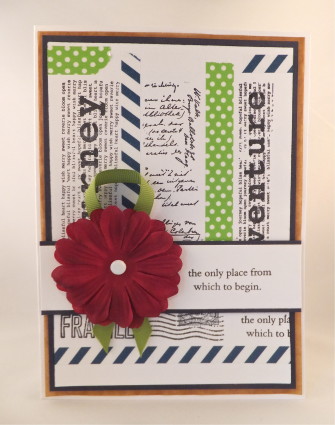
The cool thing is how easy this vertical/horizontal layout really is to adapt. If you don’t have time for the colouring, you can simply stamp on white cardstock, add some washi tape and be on your way. It’s a great way to get a mixed-media effect, or a clean-and-simple look—depending on what you want to do!
I hope you enjoyed the project as much as I did! You can watch the video on Studio SN or on the Paper Artsy You Tube channel—I’m pretty sure you’ll find lots of extra ideas on both!
Thank you also to the fantastic Leandra and PaperArtsy for inviting me to share this project with you!


