

Last week I taught a Facebook Live session with Altenew’s Ambridge Rose stamp, stencil and die collection. I absolutely love this set and the creative possibilities—and today I have a couple of variations to share with you.
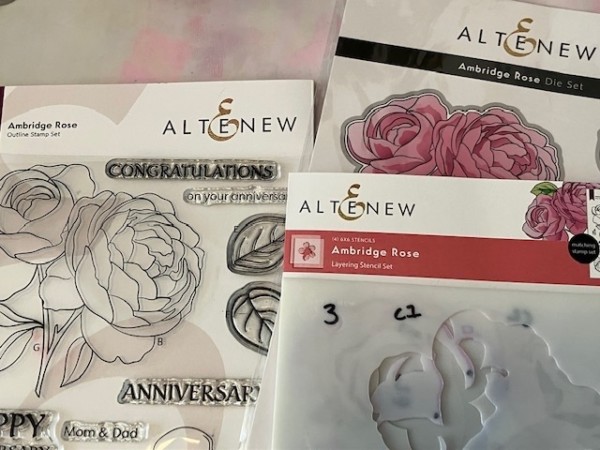
The stamp set features two large florals, which offer so many different coloring possibilities:
- Option One: Use the coordinating stencils to create blended layers with a crisp black outline
- Option Two: Use some of the layering stencils to create blended layers with a tone-on-tone look
- Option Three: Stamp, emboss and color with water-based medium (for me this time, it was waterbrush markers)
Let’s take a look. Here’s one card, with the flowers stamped in black and then layered with the stencils in a series of blue inks:
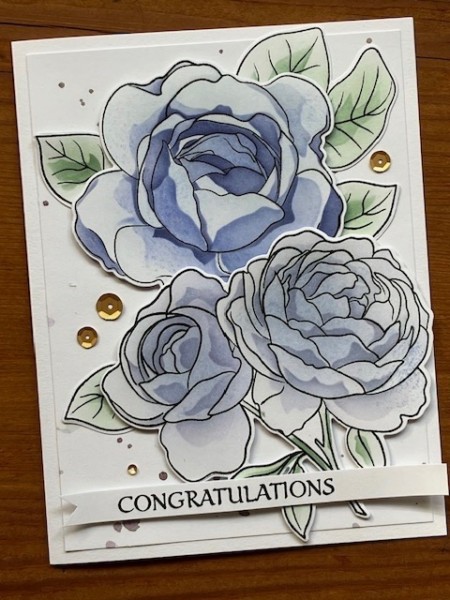
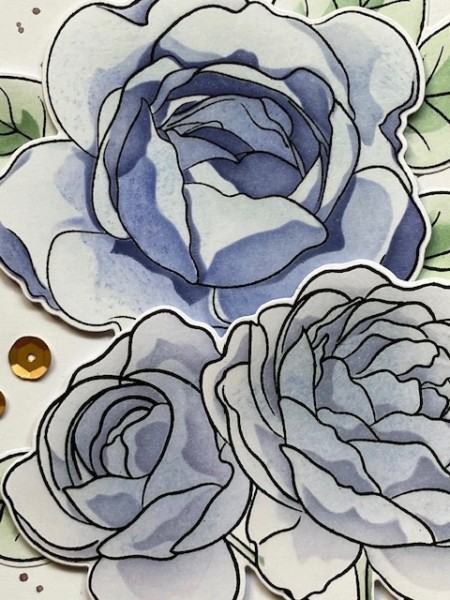
Here’s a close-up—
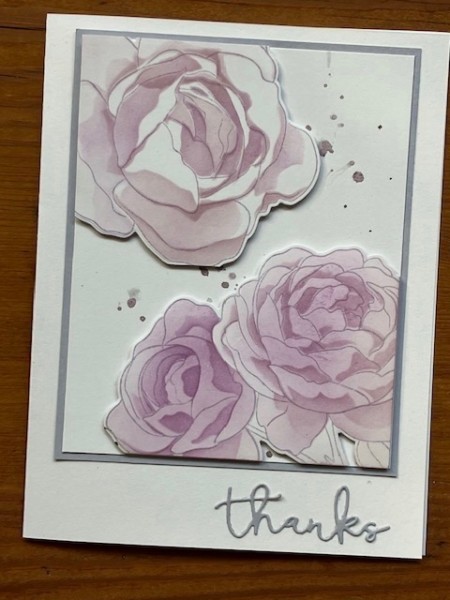
Another option for shading with stencils, is to swap out the high-contrast black ink for a softer shade—then use that same color plus another darker shade of that color. Here’s an example:
Let’s see this process—have a look at the flower in the top left. Below are the steps!
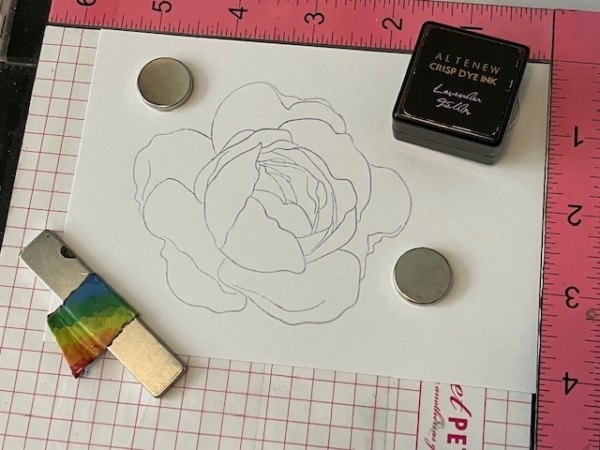
First, stamp the outline flower in a light color. I’m using Lavender Fields.
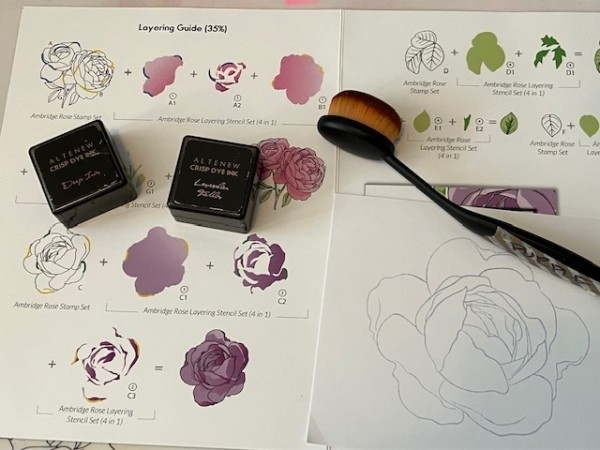
Then, follow the layering guideline in the stencil package. I’m only doing two layers here, so I’m using Lavender Fields for one layer, and Deep Iris for another one. You can use any of your blending brushes for this.
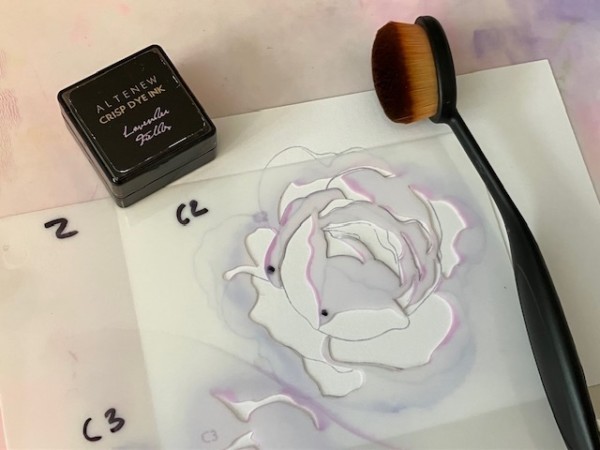
Position the matching stencil shape over the stamped image. If you wish, you can secure it in place with some low-tack tape. Then, use the brush to apply the color through the stencil onto the stamped image.

You’ll have a loosely-colored image like this.
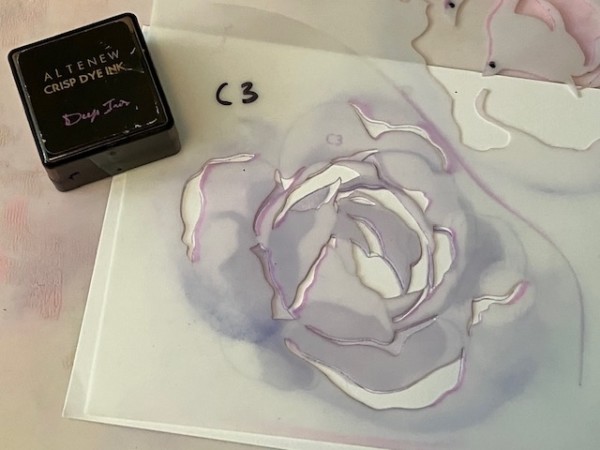
Then, place the next stencil shape onto the stamped image and color with your second, darker shade. (I don’t clean my blending brush in between!)
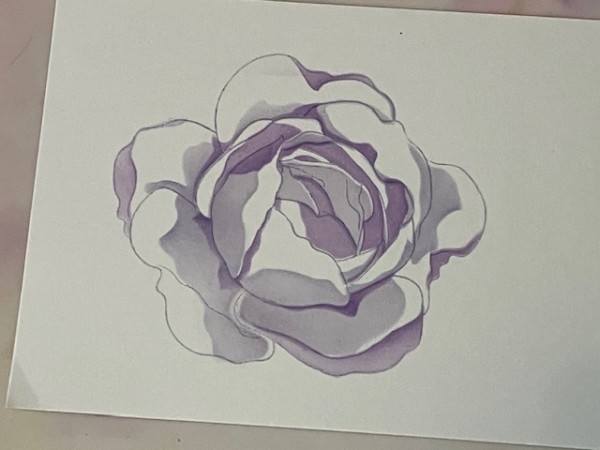
Here’s the second layer.
Remember, I’ve only colored two of the three layers—I like having the white as the base color, for contrast. Here’s the card again!

So, you can stencil a black-stamped image, or partially-stencil a tone-on-tone image… of course, the clean and simple outline stamps can also be colored with paints or waterbrush markers, too.
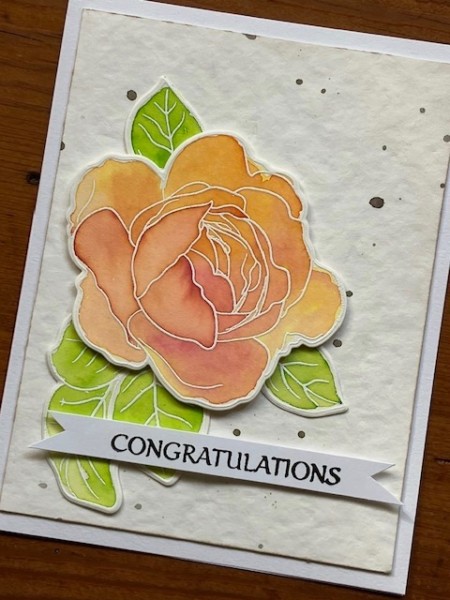
For this card, I stamped and heat-embossed the flower and leaves with white onto a mixed-media cardstock. You’ll want a sturdy surface for this. I die-cut the images, then I used the Tropical Fiesta Waterbrush Markers to color them.
Here’s a closer look—
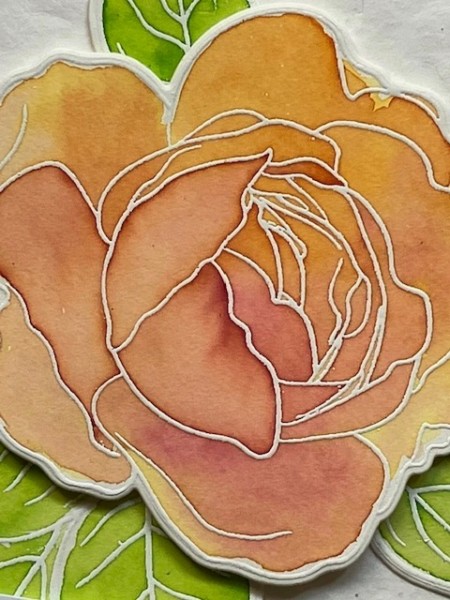
The white embossing acts as a resist, and allows me to easily blend a couple of the colors together—Crimson, Purple Wine and Sunkissed work together well for the flower, and Sweet Leaf and Lime are perfect for the leaves. Of course, you can opt for other colors, or swap out the waterbrush markers for watercolor paints if you like!
I hope you enjoyed today’s techniques—have a lovely rest of your week!


