Last Monday I hosted a Facebook Live with Altenew. This was one of my favorite projects, and I wanted to share a bit more with you about the process!
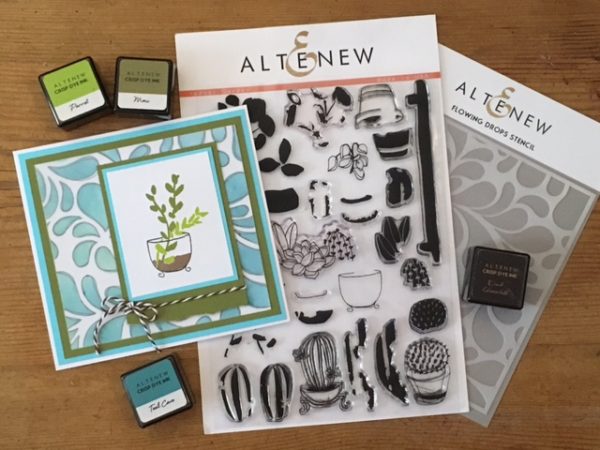
Stenciled Background with Altenew, what you need—
- Altenew Indoor Garden stamps
- Altenew Flowing Drops stencil
- Altenew inks: Permanent Black, Dark Chocolate, Parrot, Moss, Teal Cave
- MISTI stamp positioner
- Black fine-tip pen
- Vellum
- Cardstock: White, teal, olive
- Cut & Dry or foam ink applicator
- Liquid glue
Stenciled Background with Altenew, how to make it—
You can watch the video online, of course, but sometimes it’s nice to get the step-by-steps as well. So, here you go!
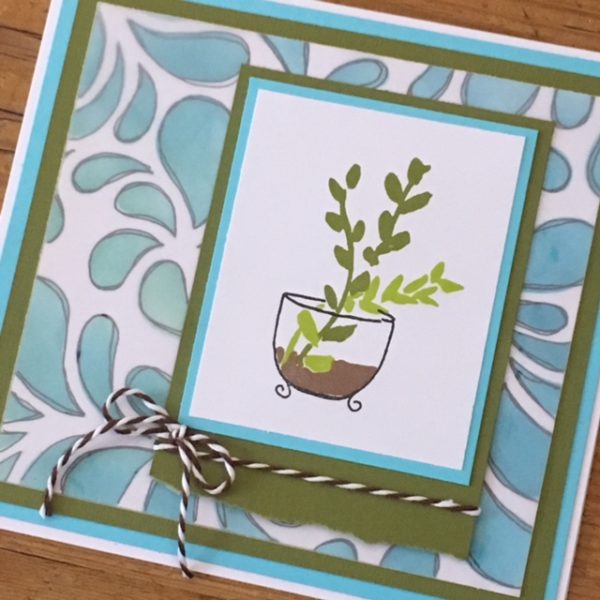
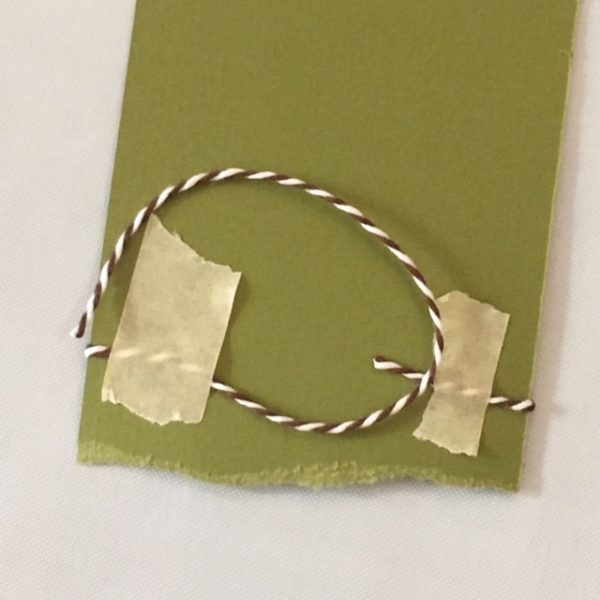
Use the MISTI to stamp the flower pot with Permanent Black, the dirt with Dark Chocolate, and the leaves with Parrot and Moss. Mat on teal, then olive cardstocks, tearing the bottom edge of the olive. Wrap the bottom edge with baker’s twine, securing the ends to the back with tape. Tie a bow in another piece of baker’s twine and use a liquid glue to glue it as shown.
Place the stencil on top of white cardstock. Use Cut & Dry or a sponge applicator to stencil with Teal Cave. Lift off the stencil, then use a fine tip pen to loosely trace around the stencil shapes. (We’re not going for perfection here!) Layer with vellum and glue then pieces to olive and teal cardstocks. Glue to the card front and add the stamped focal.
That’s it…so easy! You can watch the video, which includes this card plus several others. Enjoy!