Last month the lovely Raquel Burillo Perez, aka Scrapcosy, took a quick video of a demo I did at the PaperArtsy booth at the Creativation trade show. In it, I showed how to use PaperArtsy Infusions to create a brayered background, which I then stippled with more Infusions.
You can see how the background is made in the video…
…the card I made with it is shown here!
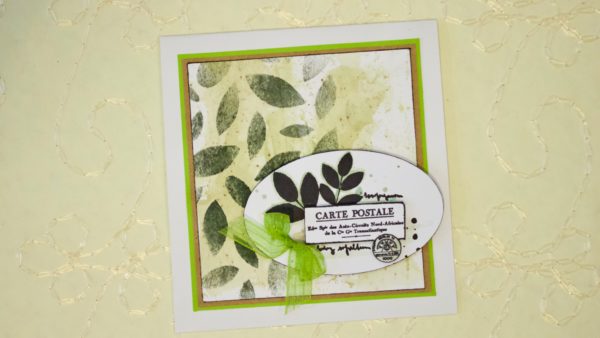
Carte Postale Card, what you need—
PaperArtsy Stamps: ESN34 (available in the UK and the US)
PaperArtsy Stencil: PS123 (available in the UK and the US)
PaperArtsy Infusions: Slime, Green Man, Emerald Isle
Cardstock: White, kraft, green
Black inkpad
Oval cutting die
Brayer, stipple brush (or foam applicator), water mister, small paintbrush, foam tape
Green ribbon
Carte Postale Card, how to make it—
To make the background, brayer a watery wash of Slime Infusions onto white cardstock. Let it dry thoroughly, then place the leaf stencil on top.
Add a very little water to the Green Man Infusions. You want the color to be liquid enough to move, but not so much that it doesn’t stencil well. I used a dry stipple brush to pounce the color through the stencil. When I tried it later with a wet brush, the color went under the stencil. You can swap a piece of Cut & Dry or a foam applicator for the stipple brush but you’ll still want to be careful not to overwater.
Stipple the color through the stencil, leaving some areas unstenciled.
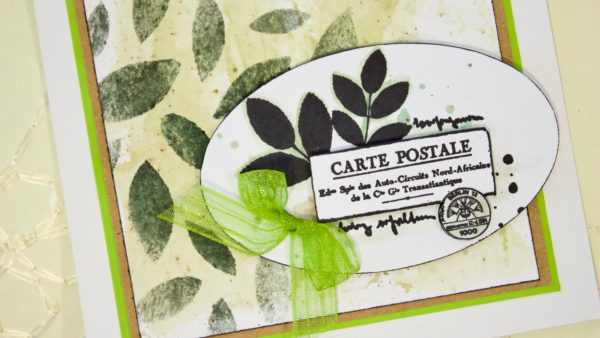
Remove the stencil and let dry, then ink the edges of the piece with black. Mat onto kraft and green cardstock, then glue onto a blank white card.
Stamp the focal image twice onto white cardstock. Die cut one into an oval shape. Use a small paintbrush and watery Slime and Emerald Isle Infusions to accent the leaves. Spatter with watery Infusions. Let dry.
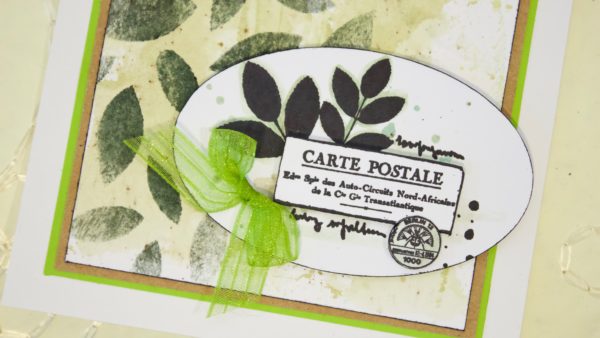
With the second stamped piece, use the brush to accent only the small postage stamp. Cut out the Carte Postale and postmark as one piece and foam tap on top of the oval. Ink the edges of the oval and foam tape to the card front.
Tie a bow in green ribbon and glue as shown.
That’s it…easy! And if you like Infusions, do check out the rest of Raquel’s videos, as she has a ton of cool techniques with this fun medium.