
Happy Wednesday, everyone!
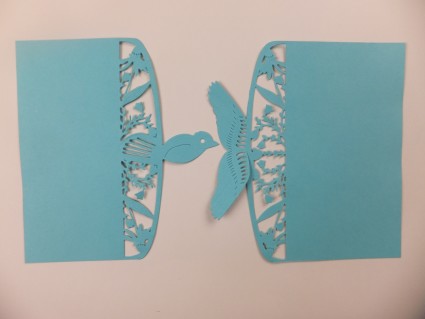
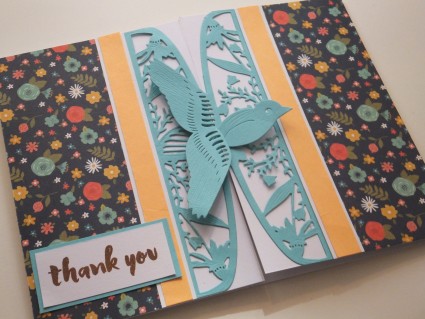
This week I’m sharing a step-by-step tutorial based on a demo I did last week on Create and Craft. This is how to use the Songbird Closure die, and the process is basically the same for the other closure dies in the range. Take a look at a finished card:

The Songbird Closure gives you a really beautiful effect, perfect for a gatefold card. Here’s a closer look—

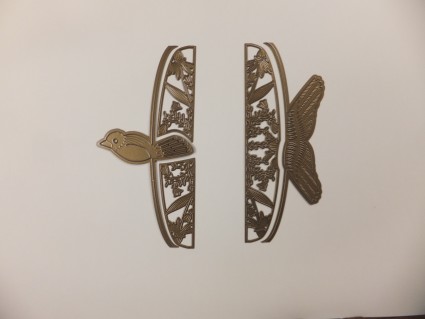
These are the dies I’m using. One side will create the right-hand closure; the other side will be the left.
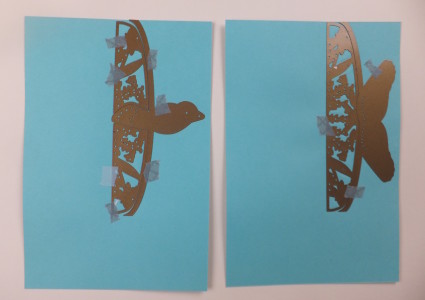
1. Tape the closure dies onto your cardstock as shown and run through your die-cutting machine. Here, I’ve got the edges plus the lacy-looking inside sections. You can use the lacy portion of the dies, or not—it’s up to you. I use washi tape to secure them down…any kind of low-tack tape will do.
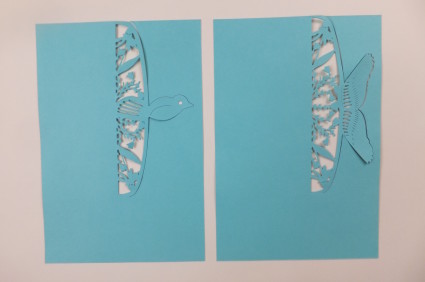
2. When they’re cut from your cardstock, they will look like this:
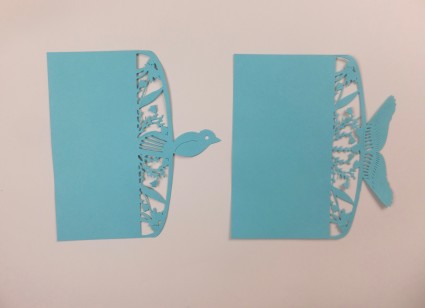
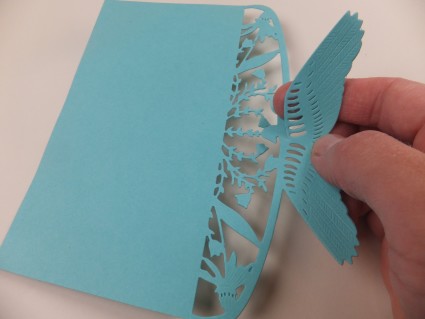
3. Trim the cardstock so you have the two pieces cut completely from the background cardstock. They will look like this. You’ll notice I’ve left a couple of inches of blue cardstock on each piece. This is so I can glue the panels to the front of my card. Of course you can trim yours down more if you like!
4. Notice the difference in the photo above, and the one below. You’ll need to take the portion that’s on the right side (the feathers) and flip it around so it looks like this:
5. Do you see this little bit of cardstock on the wing that’s connected?
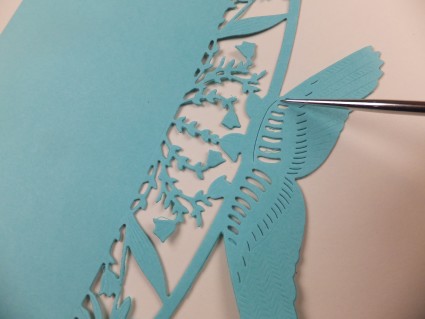
You’ll need to use a pair of scissors to snip that so the top portion of the wing can lift up. This way it can slot around the bird body.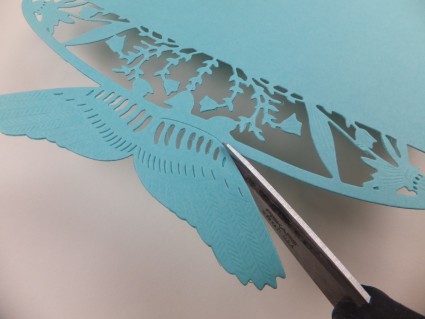
Like this: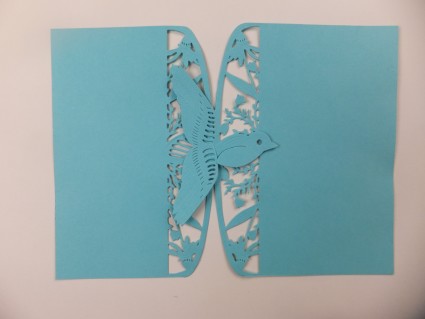
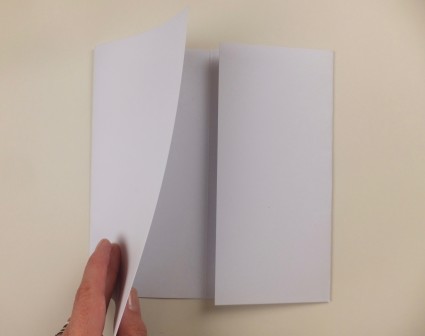
6. Your closure works for a gatefold-style card. This is a card that opens from the center, like a gate, rather than opening from the left-hand side, like a book. You can make your own gatefold card blanks, as I’ve done here, or buy them pre-scored.
7. You’ll glue one side of the closure to one side of the front of the card. Make sure the bird body extends past the edge of your card!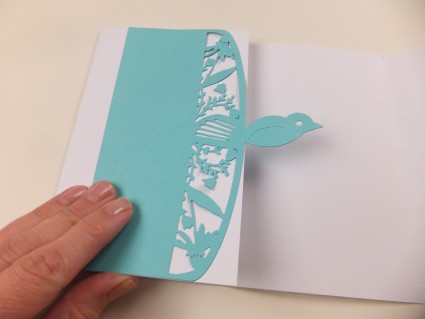
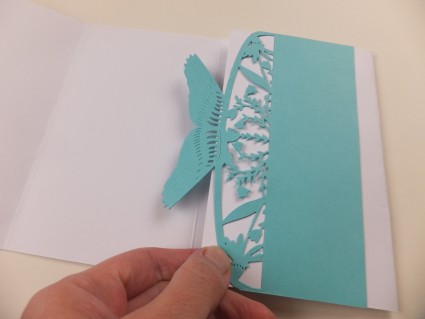
8. To close, you’ll need to twist the card gently, then interlock the bird’s wings (that part you snipped) over the bird’s body.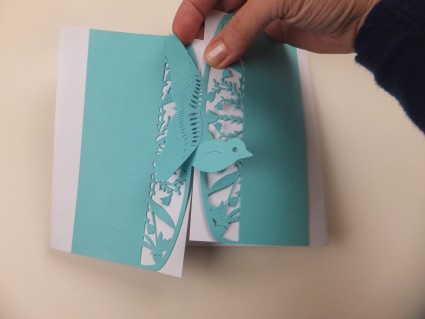
It will lay like this: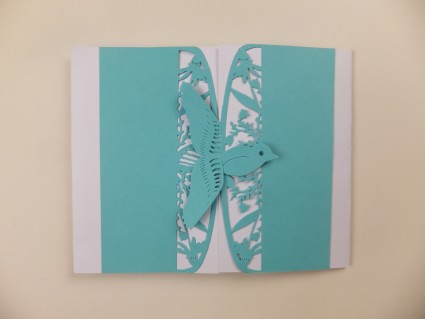
Here’s another look at the finished card. The stamp is from Altenew’s Painted Greetings set.
The Couture Songbird Closure die is available at Create and Craft in the UK; you can also find it on the Create and Craft USA site.
Enjoy, everyone! And if you’d like to see more demos, I’ll be on Create and Craft USA from September 29-October 2 with new Altenew plus Maya Road. You can watch on television, or online. Hope you can tune in!


Hi,
what size was the crd stock you used to make the gatefold card. I take it that you can not use the dies straight onto a gate folded card?Are there any tutorials on how to use them
thanks
Hello! The card base I used was really big! 8″ wide by 6″ tall. Of course you can use smaller. You can cut the die directly into the edge of the card, you would just need to accommodate for the body and wings to extend past the edge when the card is closed. I find it much less fiddly to cut and then glue. Hope that helps.