
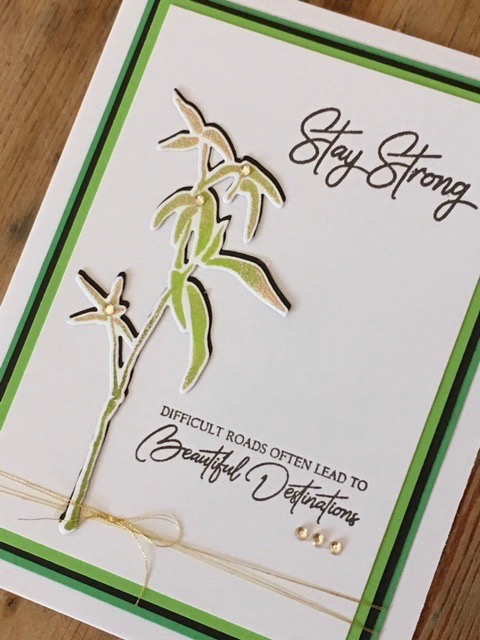
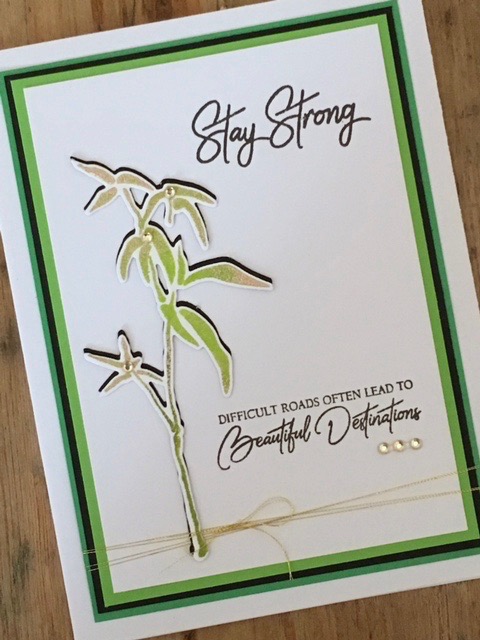
Hi friends! Want to add some dimension to your stamped and die-cut card focals? Here’s an easy way: Stamp and die-cut your image, then die-cut the same shape from a solid cardstock color (like black). Glue the two together and voila! a perfect shadow effect.
You can catch the Facebook Live video and see the complete listing of products below. PS. If you like techniques like this, why not check out Sara’s Stamping Techniques from Bella Crafts Publishing?
https://www.facebook.com/sara.naumann.75/videos/10217677613874583/
Stamps: Never Give Up (Altenew)
Dies: Never Give Up (Altenew)
(Stamps and dies available as a Never Give Up bundle.)
Embossing powder: Golden Peach (Altenew)
Inkpads: Tropical Forest Mini Cube Set, Permanent Black (Altenew)
Cardstock: White, light green, dark green, black
Rhinestones, gold embroidery thread
Blank white card
First, place the stamp and cardstock in position on the MISTI. Ink the stamp first with the Bamboo ink, then gradually ink areas of the stamp with subsequently darker ink colors. Close the MISTI and stamp. Leave the stamp and the cardstock in place but clean the stamp with a baby wipe.
Use the embossing inkpad to ink the bamboo leaf tips, then close the MISTI again. Lift and sprinkle with Golden Peach embossing powder. Tap off the excess and heat-set.
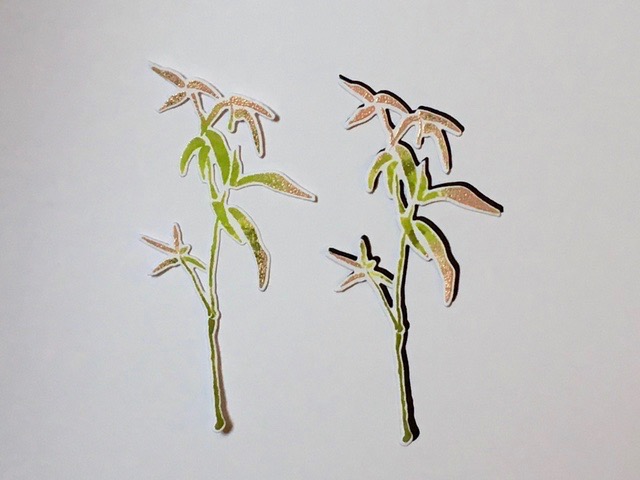
Die cut the bamboo. Die cut a second shape from black cardstock. Glue the two together, slightly offset.
Tip: Here’s a comparison—
Glue the bamboo to white cardstock and stamp the sentiment as shown. Add rhinestones and gold embroidery thread.
That’s it—easy! Thanks for joining me today!


