Today I’m so pleased to be a guest blogger over at the Paper Artsy blog with a special video and written post for making a journal cover with Eclectica stamps. You can watch the video on Studio SN or the Paper Artsy You Tube channel—I’m pretty sure you’ll find lots of ideas on both!
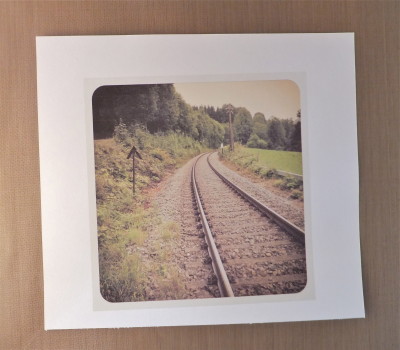
1. Print your photo onto standard cardstock. My photo is an Instagram picture, so it’s square and already has a vintage effect to it. Be sure to let the ink dry completely.
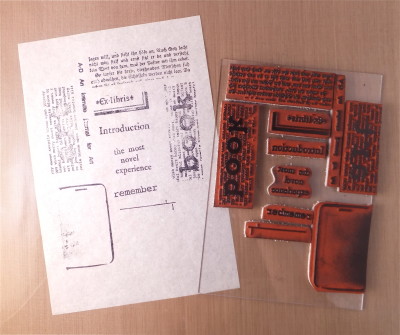
2. Arrange all of your Eclectica ESN01 stamps on a 5”x7” Flexi Block. I played around with the positioning of this, using scrap tissue paper. After you’ve arranged the stamps, ink them with Jet Black Archival and stamp onto a piece of white tissue paper. Let the ink dry.
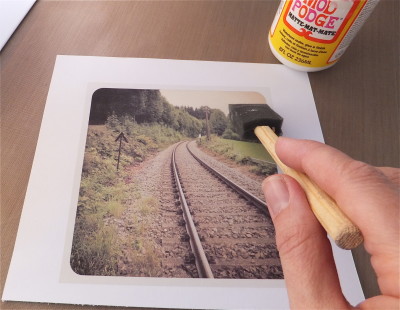
3. Use a foam brush to apply Mod Podge to the photo. Think of the application like fingernail polish—you don’t need a heavy coat.
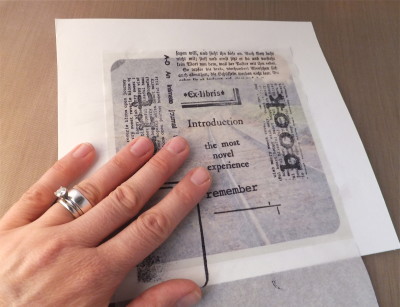
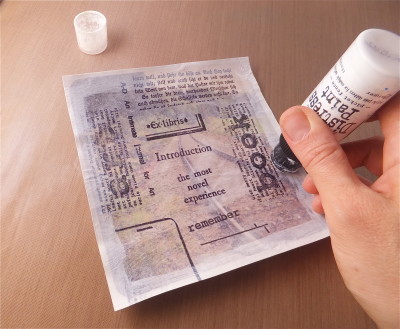
4. Place the stamped tissue on top and smooth gently from the centre out. Flip over and smooth (you can also use a brayer). Let dry, then trim to size.
4. Apply white paint around the outside edges of the photo. I used Ranger’s Picket Fence, but you could use any white acrylic paint—the Fresco Finish Snowflake is a good option. Let dry, then ink the edges black.
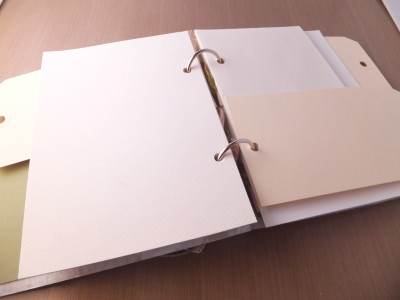
5. Paint the front and back of two chipboard pieces white. When dry, glue the photo to one piece of chipboard, as the cover. Glue a piece of green cardstock as the inside of each cover. Punch two holes along the edge of one piece of chipboard, then align it with the second piece and punch again.
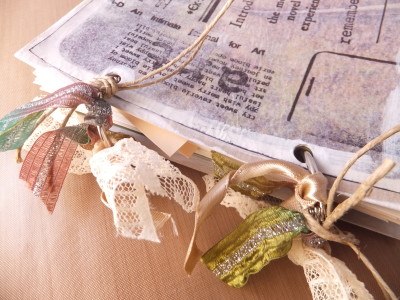
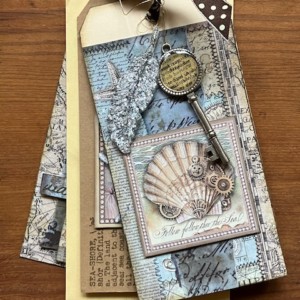
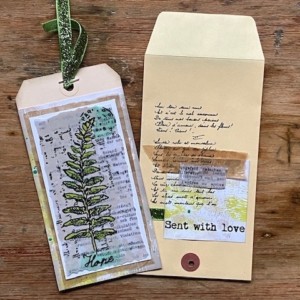
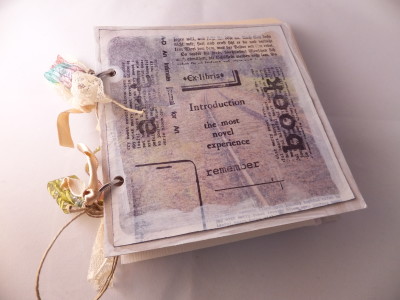
My latest thing has been making little books with pages that extend past the cover—it makes the book look really interesting from the outside! So this book is filled with tags, cardstock pages and envelope pockets. I love using metal rings to hold the book together. It’s easy and doesn’t require any bookbinding skills, plus you can always add pages/envelopes and move them around if you like.
I think a book like this is a great way to stash memorabilia, notes, ideas, sketches…just about anything! You can also adapt the tissue paper collage technique for a handmade card, art journal page or for other kinds of journals—the PaperArtsy Note Pad would be a good choice!
I hope you enjoyed the tutorial as much as I did! You can see a video tutorial for this project on the PaperArtsy You Tube channel or on Studio SN—and hopefully you find a ton of other cool videos on both channels to enjoy!
Thank you also to the lovely Leandra and PaperArtsy for letting me share this project with you here!